
EZ NAV
Abbreviations – Build Core – Mercenary – Early Game – Mid Game – End Game – Challenges – Dungeons and Rifts
Official Documentation
STATUS OF THE 2.4 GUIDE UPDATE
I've been really busy irl, so it's taking a while to get this done. Regardless, the main guide up to THE VOID quest is (mostly) up-to-date. All Dungeons up to The Void and all Rifts up to Scosglen should be up to date as well.
INTRODUCTION
Think of the Melee Sorceress as the angry, rebellious, and often overlooked younger sibling to her more refined and beloved Caster sistren. She’s not as powerful, or as popular, and things don’t come as easy for her, but what she lacks in raw talent and divine favor, she makes up for in dogged determination and stubborn tenacity.
In other words, Melee Sorc may not be fast or flashy, but it’s a solid and reliable build.
ABOUT THE GUIDE
The guide is written specifically for SOLO, SELF-FOUND (SSF) play. As such, gear choices will be based on what the average player can reasonably find during a playthrough, not necessarily what’s "best-in-slot." If possible, this guide will avoid items such as SSSUs, UMOs, Effigies, Relics, unique Jewels, and Shrinecrafts with impossible to get mod combos. You’re free to use this stuff, but none of this is SSF-friendly and should never be required to complete core content with a mainline build.
If you’re new and looking for a brainless OP build to faceroll all content, this ain't it. You'll be happier playing literally any Paladin or the current flavor-of-the-month meta build. If you're dead-set on playing a Sorc and have tons of TG burning a hole in your pocket, skip this guide and just buy a Wyrd Sorc.
PROS AND CONS
► EXPAND
PROS:
NEUTRAL:
CONS:
- Versatile.
- High survivability.
- Decent boss killer.
- Hardcore-friendly (the build, not the guide).
NEUTRAL:
- Moderate skill-switching.
- Uses 2 different playstyles:
- Aggressive direct melee playstyle (mostly for bossing)
- Indirect point-blank ranger playstyle (mostly for leveling and farming)
CONS:
- Slow and/or boring farmer. A Sorc’s melee skills aren’t efficient at clearing mobs (Bladestorm is slow and Fusillade still doesn’t pierce targets).
ABBREVIATIONS
► EXPAND
Some common abbreviations used in the guide.
Attribute
STR = Strength
DEX = Dexterity
VIT = Vitality
NRG = Energy
Speed
AS = Attack Speed
BP = Breakpoint
BS = Block Speed
CS = Cast Speed
FPA = Frames Per Animation
HR = Hit Recovery
MS = Movement Speed
Sustain
LaeK = Life after each Kill
LL = Life Leech (Life Stolen per Hit)
LoMA = Life on Melee Attack
Maek = Mana after each Kill
ML = Mana Leech (Mana Stolen per Hit)
MoMA = Mana on Melee Attack
Gear Mods
AA = All Attributes
AR = Attack Rating
BD = Bonus Defense
CB = Crushing Blow
CtB = Chance to Block (or Block Chance)
CtC = Chance to Cast
DS = Deadly Strike
DR = Damage Reduction
ED = Enhanced Damage (weapons) or Enhanced Defense (armor)
EWD = Enhanced Weapon Damage
GF = Gold Find
IED = Innate Elemental Damage
MF = Magic Find
PLR = Poison Length Reduction
Res = Resistance
Miscellaneous
AG = Attack Ground
AC = Arcane Crystal
Alvl = Area Level
Clvl = Character Level
CD = Cooldown
DPS = Damage Per Second
F/C/L = Fire/Cold/Lightning a.k.a Rainbow
Ilvl = Item Level
LCS = Lying Character Sheet
MO = Mystic Orb
Pita = Pain in the ass
QC = Quick Cast
Reqs = Requirements
SU = Sacred Unique (SSU and SSSU = higher “tiers” of SU)
T = Tier (for example, T4 = Tier 4)
TU = Tiered Unique
UMO = Unique Mystic Orb
WDM = Weapon Damage Modifier

ATTRIBUTE POINTS
STR = 120 Base (Early+Mid+Late Game) → None (End Game)
DEX = Everything else
VIT = None
NRG = None
BASE SKILLPLAN
MELEE
- Mooncall [25]
- Bladestorm [10]
- Fusillade [10]
- Arcane Sustenance [1]
ARCANE
- Immersion [1]
- Arcane Torrent [1]
- Raven Familiar [1]
COVEN
- Living Flame [25]
- Warp Armor [25]
- Nova Charge [6]
REWARD
- Baneblade [15]
- Symbol of Esu [5]
- Force Blast [1]
MASTERY
- Melee Devotion [1]
- Meditation [3] → Tenacity [5]
- Endurance [10]
Where you distribute your remaining points will depend entirely on what End Game path you take (which will depend on what gear you find).
ELEMENTAL PATH
MELEE
- Paradigm Shift [1]
- Cold Blooded [1]
Remaining points = Raven Familiar and Premonition
PHYSICAL PATH
MELEE
- Determination [1]
- Fatal Focus [8]
Remaining points = Premonition, maybe Firedance
► SKILL NOTES
INNATE
MELEE
COVEN
ARCANE
MASTERY
REWARD
OSKILLS
- MANA SHIELD
The Mana drain from taking Elemental damage is much higher than from Phys damage. Also, the shield will sometimes break. I assume this happens if you lose all your Mana due to damage taken.
MELEE
- MOONCALL
You only get the additional Max Life and damage while the buff is active. - PARADIGM SHIFT (Elemental path)
Taking this won’t automatically reduce your Phys damage to zero. It basically just reduces your EWD. - COLD BLOODED (Elemental path)
You only get the innate Cold Pierce while Mooncall is active. - BLADESTORM
Viable AG skill now that it actually has range. - DETERMINATION (Phys path)
You’ll get additional Defense when Phys damage-boosting skills are active (e.g. Mooncall, Baneblade, Firedance). - FATAL FOCUS (Phys path)
Up to 40% CtB is still possible with Premonition+Fusillade as long as your DEX and/or %Base Block Chance are high enough. - FUSILLADE
Targeting is random and it’s useless against fast and/or teleporting enemies. Treat it as a supplemental damage skill. Its CD timer will always be 1 second longer than the duration, so use it all the time. - ARCANE SUSTENANCE
Helps keep Mana Shield fueled, but only in direct melee combat. - PREMONITION
Only gives you the potential to push past the 50% Max Block limit (up to 80%), and only while Fusillade is active. You'll still need enough DEX to actually hit 80% CtB. This skill is completely useless until End Game.
DEX needed per +x% Increased Base Block Chance for a clvl 145 Sorc to hit Max Block (assumes Baneblade is active):- +0% = 5820 DEX
- +1% = 4660 DEX
- +2% = 3885 DEX
COVEN
- LIVING FLAME
Life+regen to help keep you alive when you can’t sustain melee. - FIREDANCE (Phys path)
Since it also increases Spell Damage, don’t let LCS trick you into thinking your DPS has skyrocketed. It hasn’t. - WARP ARMOR
Taken mostly for the 17% Avoid. - NOVA CHARGE
Helps keep Mana Shield fueled. You’re putting 6 points here to hit the 50% DEX to NRG conversion cap. Every time you put points into DEX, you’ll need to recast the buff to get the new NRG values.
ARCANE
- RAVEN FAMILIAR
Taken mostly for the Mana boost, but extra +Skills can still be helpful. Summon this before activating any of your buffs so they also benefit from the +Skills.
MASTERY
- MELEE DEVOTION
The skill’s damage reduction is discrete from other forms of DR, so it won’t show up in your character sheet. - MEDITATION
You’ll spec into this early on to help with Mana problems. - TENACITY
+5% Phys Res isn't much, but every little bit helps. - ENDURANCE
+10% Max Life will save your ass. Trust me.
REWARD
- BANEBLADE
Ultimate Skill. Each time you put points into the skill, you’ll have to deactivate, then reactivate, the buff for the new values to take effect. - SYMBOL OF ESU
Ennead Challenge Reward Skill. You’re only putting points here for the innate Fire/Cold/Lightning Absorb. - FORCE BLAST
Black Road Reward Skill. Super-fast debuff nova that’s incredibly useful against enemies dealing Phys damage, especially rangers. Costs a lot of Mana, though. Save it for emergencies or against specific enemies.
OSKILLS
- SPIRAL DANCE
AG skill that’s decent vs. trash mobs, but terrible vs. single targets. Only the nova at the end of the attack deals damage. - MIND CONTROL
Intended for the Triune boss fight, but it can also charm many other monster types. Using Mind Control on a huge mob can save your bacon when you’re about to get swarmed (e.g. Viz-jun, Scosglen). Just be aware, it doesn’t work on every monster.
► RELICS
Some Relics to consider. None of these are required. See this page for the full list of Relics.
GENERAL-PURPOSE
FOR ELEMENTAL BUILDS
FOR PHYS BUILDS
GENERAL-PURPOSE
- Relic (Divine Judgment)
 Relic
Relic
Required Level: 75
+(9 to 16) to Divine Judgment
+(21 to 25) to Strength
(2 to 4)% to Strength
Has a very small AoE, but its high WDM and multi-hit mechanic make this a better single-target skill than anything Melee Sorc has access to. - Relic (Cherubim)Relic
Required Level: 75
5% Life stolen per Hit
+(6 to 13) to Cherubim
(4 to 8)% to Strength
Long-range auto-targeting missiles. Paladins have all the best skills. - Relic (Fusillade)Relic
Required Level: 75
+(4 to 12) to Fusillade
10% to Dexterity
Reduces the CD by 1 second and boosts DEX +6%. - Relic (Dark Power)Relic
Required Level: 75
Dark Power: Doubled Magic Damage
Adds 100-200 Magic Damage
+(6 to 11) to Dark Power
More Magic damage. - Any Relic with a damage-dealing buff (e.g. Hive, Path of Flames).
FOR ELEMENTAL BUILDS
- Relic (Banish)
Large AoE curse that adds flat Elemental and Magic damage to your attacks. - Relic (Mooncall)Relic
Required Level: 75
(15 to 20)% Innate Elemental Damage
+(14 to 25) to Mooncall
+100 to Life
Additional Lightning pierce to help boost damage.
FOR PHYS BUILDS
- Relic (Bladestorm)Relic
Required Level: 75
Adds 50-100 Magic Damage
(4 to 6)% Life stolen per Hit
+(5 to 9) to Bladestorm
Some extra LL and Magic damage. - Relic (Nightmare)Relic
Required Level: 75
Nightmare Reduces Physical Resistance by 6%
+(4 to 13) to Nightmare
Curse that reduces enemy movement speed and prevents them from healing on-attack/kill, but the -6% Enemy Phys Res the Relic adds to Nightmare is the main reason to consider this. - Any Relic that gives DS, flat Phys/Magic Damage, sustain, Max Res, or helps with BPs.
BREAKPOINTS
ATTACK SPEED: Warp Blades = 6 / 23 / 56 / 129 (5 fpa)
ATTACK SPEED: Crystal Swords = 15 / 46 / 109 (5 fpa)
ATTACK SPEED: Sorc Orbs (except Jared’s Stone) = 5 / 29 / 78 (5 fpa)
ATTACK SPEED: Staves (except War Staff) = 5 / 10 / 26 / 44 / 72 / 129 280 (6 fpa)
HIT RECOVERY = 5 / 11 / 20 / 35 / 60 / 109 / 280 (3 fpa)
BLOCK SPEED = 3 / 7 / 13 / 20 / 32 / 48 / 75 / 129 / 280 (4 fpa)
CAST SPEED: Staves = 6 / 19 / 42 / 83 / 194 (5 fpa)
CAST SPEED: 1H swing Weapons = 8 / 22 / 42 / 78 / 157 (6 fpa)
► D2STATS DROP NOTIFIER
Some lines to add to your D2Stats Notifier.
"Enchanted Rune"
"Arcane Shards"
"Arcane Crystal"
"Warp Blade" sacred low normal superior magic rare
"Ceremonial Armor" sacred low normal superior magic rare
"Spiked Shield" sacred low normal superior magic rare
"Sash" sacred magic rare
THE BASICS
► GAMEPLAY MECHANICS
PLAYSTYLE
This isn’t really a melee build anymore. It’s more of a point-blank Ranger that can also melee. Most of the time, you’ll be in Attack Ground mode (see below). The only times you’ll ever really engage in direct melee combat will be vs. bosses or when you need LoMA to keep you healthy.
ATTACK GROUND
Holding the “Stand Still” key to attack-in-place will proc the missiles from your skills, even if you don’t have a target selected. However, a direct melee hit is still required to trigger on-attack mods such as LoMA, MoMA, on-attack procs, and a Warp Blade’s AoE.
AG will mostly be used for moving through areas and farming. You’ll use a buff and stutter-step playstyle:
Buff with Mooncall → AG 1-3 times → take a few steps → AG again → take a few more steps → repeat. Deploy Fusillade into larger and/or more durable mobs as-needed.
QUICK CAST
Binding a skill to a Quick Cast (QC) key allows you to immediately use a skill without switching to it first. QC Mooncall, Fusillade, Force Blast, and Jitan’s Gate/Teleport work well for me, but you can bind whatever skills you want.
► OFFENSE
DAMAGE
Your damage type will depend on your gear kit (which, in turn, will determine what melee skills you’ll ultimately spec into).
The Elemental Spell Damage mod screws with your LCS damage numbers. SD does boost flat Elemental damage, but only on a direct melee hit. It does not carry to any projectiles, novae, or your Warp Blade’s AoE. This is important because direct melee hit damage is what LCS shows, not your actual effective DPS. Because of this, do not base gear choices solely on LCS numbers. It’s called the Lying Character Sheet for a reason.
Additionally, Deadly Strike and Crushing Blow are discrete mods. They won’t show up as part of the LCS’ damage calculation. Don’t automatically dismiss items with these mods just because they may drop your LCS damage.
When in doubt, use the Training Dummies in Act 1 to test your effective DPS (look inside the tent, east of Gheed’s house).
Your damage type will depend on your gear kit (which, in turn, will determine what melee skills you’ll ultimately spec into).
- Phys kits
You’ll have multiple sources of Phys damage multipliers from skills and items. Think of these as a foundation to build from. Combined, they can reach 1500%+. This means even a small amount of additional flat damage will go a long way to boosting your overall damage output. To push it further, you can add Deadly Strike, which has a chance to double your Phys and Converted damage.
Main foci: DEX, Max Damage, DS
- Elemental kits
Similar to Phys kits, but with Elemental damage. Innate Elemental Damage will be your multiplier for whatever flat Fire/Cold/Lightning (a.k.a. Rainbow) damage you can stack. To push damage further, you’ll add sources of -x% Enemy Elemental Resistances to pierce and enemy’s Elemental Res. Stacking as much DEX as possible will also help boost your weapon’s base IED.
Main foci: DEX, Flat Rainbow damage, Elemental pierce, IED
The Elemental Spell Damage mod screws with your LCS damage numbers. SD does boost flat Elemental damage, but only on a direct melee hit. It does not carry to any projectiles, novae, or your Warp Blade’s AoE. This is important because direct melee hit damage is what LCS shows, not your actual effective DPS. Because of this, do not base gear choices solely on LCS numbers. It’s called the Lying Character Sheet for a reason.
Additionally, Deadly Strike and Crushing Blow are discrete mods. They won’t show up as part of the LCS’ damage calculation. Don’t automatically dismiss items with these mods just because they may drop your LCS damage.
When in doubt, use the Training Dummies in Act 1 to test your effective DPS (look inside the tent, east of Gheed’s house).
► DEFENSE
COVEN PASSIVE COMBOS
Brief overview of the different passive combos recommended for most players.
SURVIVABILITY
Sorcs can’t stack huge amounts Life+Defense+Phys/Elemental Res like other classes. They need to create a multi-layered defense with many different defensive mods. Since this build uses a Fire/Lightning combo, you’ll have 2 main defensive layers:
Main foci: DEX, Phys Res, Life Regen, LL, LoMA
Brief overview of the different passive combos recommended for most players.
- Fire/Lightning (Life Regen+Avoid)
Not very good early on, but highly versatile once Coven skills are maxed. High regen can counter both Phys and Elemental damage (especially Poison and Burn damage). This allows you to sacrifice more traditional defensive mods in favor of other beneficial mods. Also good for people who don’t like managing their Life and Mana pools. - Poison/Lightning (Phys Res+Avoid)
Great all-rounder that works well from beginning to end. It’s not as effective as a Fire spec against Elemental damage, but it shines against Phys Damage. It also leaves you with a lot of extra Skill Points, which you can use on the Specialization mastery for more damage. - Cold/Lightning (Defense+Avoid)
Great early on, but not as good later. High Block builds don’t usually need tons of Defense because its redundant. - Poison/Fire (Phys Res+Life Regen)
Mediocre for regular play because no Avoid or Nova Charge, but has the highest damage potential because Specialization and Firedance. Recommended mostly for Labs (the Avoid penalty in higher Labs makes Warp Armor practically useless).
SURVIVABILITY
Sorcs can’t stack huge amounts Life+Defense+Phys/Elemental Res like other classes. They need to create a multi-layered defense with many different defensive mods. Since this build uses a Fire/Lightning combo, you’ll have 2 main defensive layers:
- Inner layer
Life, Life sustain, Life Regen - Outer layer
Block, Avoid, Defense, Phys Res, Mana Shield, Force Blast
Main foci: DEX, Phys Res, Life Regen, LL, LoMA
► SPECIFIC DANGERS
Situations that are especially dangerous:
- Slow/Chill
Anything that reduces your Attack Speed will reduce LoMA potential. There isn’t much you can do about Slow, but equipping something with the “Cannot Be Frozen” mod will make all those Cold-based enemies a lot less annoying. - Poison
Getting poisoned will reduce or reverse your Life regen. Some Poison is too powerful to counter with regen and Poison Res, so adding Poison Length Reduction will at least reduce the amount of time you'll stay poisoned. - Running out of Mana
No Mana = no skills and no Mana Shield = death. Supplement Arcane Sustenance with Mana Regen to help keep your Mana pool filled.
THE TL;DR ON HOW TO PLAY:
- Summon Raven Familiar → buff with Nova Charge, Mana Shield, Baneblade, and any oskill buffs.
- Melee Playstyle = Buff with Mooncall → deploy Fusillade → go nuts with Bladestorm
- AG Playstyle = Buff with Mooncall → stutter-step with Bladestorm or Spiral Dance → deploy Fusillade into larger mobs
- Debuff with Force Blast, as needed
- Mind Control monsters when you’re desperate

Mercs aren’t really useful after a certain point because they’re too stupid to avoid fatal attacks. Nevertheless, a merc will still be helpful while leveling. I prefer the Rogue Priestess. She can spread damage over a broad range, and the Life Regen from Vindicate is ridiculously helpful early on.
► CLASS-SPECIFIC BONUSES
CLASS-SPECIFIC BONUSES
Defensive Harmony:
Slows Attackers by 25%, with an additional +1% slow per 5 clvls
Heroic Strength:
+1% Enhanced Weapon Damage per DEX point
+1 Life Regeneration per DEX point
+0.25 Energy Factor per DEX point
Other Bonuses:
+1% Phys Res per 4 clvls
+1% chance to avoid melee attacks per 40 DEX (capped at 60%)
► GEAR
Generally, you can just equip your merc with whatever decent gear you find. Prioritize damage, HR, AS, DEX, and Res.
That said, here is a list of useful items, in case you happen to find them as you go.
GEAR
Weapon:
Body Armor:
Helm:
Belt:
Gloves:
Boots:
Amulet: Rare with +Skills and any combination of DEX, AS, Life, or a Reanimate →
SOCKET FILLERS
Weapon: Skulls → Jah Runes
Armor: Res Gems → Amethysts
MYSTIC ORBS
Weapon: ED to cap → Max Damage → AS (if needed)
Armor: Elemental Res → HR → Max Damage
Amulet: Phys DR → Life → MF
That said, here is a list of useful items, in case you happen to find them as you go.
GEAR
Weapon:
Banshee
→ Banshee
Bows
'Eth'
Runeword Level: 15
1% Chance to cast level 7 Abyss on Striking
20% Attack Speed
5% Movement Speed
+0.25 to Maximum Damage (Based on Character Level)
Adds 3-7 Cold Damage
+(18 to 35)% Enhanced Damage
+5% to Cold Spell Damage
Cold Absorb 5%
10% Gold Find
Bows
'Eth'
Runeword Level: 15
1% Chance to cast level 7 Abyss on Striking
20% Attack Speed
5% Movement Speed
+0.25 to Maximum Damage (Based on Character Level)
Adds 3-7 Cold Damage
+(18 to 35)% Enhanced Damage
+5% to Cold Spell Damage
Cold Absorb 5%
10% Gold Find
Shockwave

in a Short or Long War Bow → Shockwave
Bows
'IthShael'
Runeword Level: 35
50% Chance to cast level 14 Punishers on Kill
+15% Bonus to Poison Skill Duration
+(11 to 15) to Maximum Damage
+(58 to 72)% Enhanced Damage
+10% to Poison Spell Damage
(3 to 5)% Chance of Crushing Blow
Slow Target (11 to 15)%
+(21 to 40) to Dexterity
+(21 to 40) to Energy
Herald of Skartara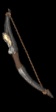
→ Herald of Skartara
Reflex Bow (4)
Two-Hand Damage: (23 - 29) to (37 - 48)
(Amazon Only)
Required Level: 11
Required Dexterity: 103
Item Level: 29
Dexterity Damage Bonus: (0.15 per Dexterity)%
1% Chance to cast level 3 Phalanx on Kill
1% Chance to cast level 6 Celerity on Kill
15% Attack Speed
Adds (11 to 15)-(21 to 30) Damage
+(35 to 57)% Enhanced Damage
10% Magic Find
Socketed (2)
Two-Hand Damage: (63 - 77) to (93 - 108)
(Amazon Only)
Required Level: 30
Required Dexterity: 150
Item Level: 40
Dexterity Damage Bonus: (0.15 per Dexterity)%
2% Chance to cast level 7 Phalanx on Kill
2% Chance to cast level 10 Celerity on Kill
25% Attack Speed
Adds (25 to 35)-(41 to 50) Damage
+(81 to 103)% Enhanced Damage
20% Magic Find
Socketed (4)
Two-Hand Damage: (124 - 142) to (173 - 204)
(Amazon Only)
Required Level: 48
Required Dexterity: 290
Item Level: 67
Dexterity Damage Bonus: (0.15 per Dexterity)%
3% Chance to cast level 11 Phalanx on Kill
3% Chance to cast level 14 Celerity on Kill
35% Attack Speed
Adds (36 to 45)-(51 to 70) Damage
+(126 to 149)% Enhanced Damage
30% Magic Find
Socketed (5)
Two-Hand Damage: (168 - 187) to (230 - 263)
(Amazon Only)
Required Level: 57
Required Dexterity: 570
Item Level: 85
Dexterity Damage Bonus: (0.15 per Dexterity)%
4% Chance to cast level 13 Phalanx on Kill
4% Chance to cast level 20 Celerity on Kill
40% Attack Speed
Adds (51 to 60)-(71 to 90) Damage
+(149 to 171)% Enhanced Damage
40% Magic Find
Socketed (6)
Fire
Pantheon
(Amazon Bow Set)
→ Fire
Reflex Bow (Sacred)
Two-Hand Damage: (159 - 192) to (200 - 237)
(Amazon Only)
Required Level: 80
Required Dexterity: 680
Item Level: 1
Dexterity Damage Bonus: (0.15 per Dexterity)%
5% Chance to cast level 1 Arrow on Striking
Adds 25-50 Damage
+150 to Maximum Fire Damage
+150 to Maximum Lightning Damage
+150 to Maximum Cold Damage
+(100 to 150)% Enhanced Damage
Socketed (6)
Pantheon
(Amazon Bow Set)
Askarbydd
Askarbydd
Reflex Bow (Sacred)
Two-Hand Damage: (230 - 311) to (330 - 455)
(Amazon Only)
Required Level: 100
Required Dexterity: 1020
Item Level: 105
Dexterity Damage Bonus: (0.15 per Dexterity)%
50% Attack Speed
Adds (70 to 110)-(150 to 230) Damage
15% Life stolen per Hit
+(140 to 200)% Enhanced Damage
+(1 to 10) to Rapid Wyrmshot
Maximum Poison Resist +2%
Poison Length Reduced by 25%
Requirements +50%
Socketed (6)
Body Armor:
Akara's Robe (1)
→ Akara's Robe
Quilted Armor (1)
Defense: 74 to 100
Required Level: 10
Required Strength: 10
Item Level: 255
+50 Defense
+(6 to 10) to all Attributes
+50 to Life
Elemental Resists +(11 to 15)%
Cannot be Upgraded
Socketed (2)
Quilted Armor (1)
Defense: 74 to 100
Required Level: 10
Required Strength: 10
Item Level: 255
+50 Defense
+(6 to 10) to all Attributes
+50 to Life
Elemental Resists +(11 to 15)%
Cannot be Upgraded
Socketed (2)
Akara's Robe (3)
→ Akara's Robe
Quilted Armor (3)
Defense: 496 to 599
Required Level: 50
Required Strength: 175
Item Level: 255
+1 to All Skills
+250 Defense
+(11 to 20) to all Attributes
+100 to Life
Elemental Resists +(21 to 25)%
Cannot be Upgraded
Socketed (5)
Quilted Armor (3)
Defense: 496 to 599
Required Level: 50
Required Strength: 175
Item Level: 255
+1 to All Skills
+250 Defense
+(11 to 20) to all Attributes
+100 to Life
Elemental Resists +(21 to 25)%
Cannot be Upgraded
Socketed (5)
Leather of Aut
→ Leather of Aut
Hard Leather Armor (4)
Defense: (66 - 75) to (132 - 151)
Required Level: 2
Required Strength: 28
Item Level: 1
+(2 to 4) to Whirlpool
+(18 to 35)% Enhanced Defense
(3 to 5)% to Strength
(3 to 5)% to Dexterity
(3 to 5)% to Vitality
(11 to 20)% Bonus to Defense
Socketed (2)
Defense: (267 - 297) to (449 - 500)
Required Level: 19
Required Strength: 55
Item Level: 31
+(5 to 8) to Whirlpool
+(52 to 69)% Enhanced Defense
(9 to 11)% to Strength
(9 to 11)% to Dexterity
(9 to 11)% to Vitality
(21 to 30)% Bonus to Defense
Socketed (4)
Defense: (701 - 761) to (1131 - 1228)
Required Level: 37
Required Strength: 193
Item Level: 51
+(9 to 12) to Whirlpool
+(87 to 103)% Enhanced Defense
(15 to 17)% to Strength
(15 to 17)% to Dexterity
(15 to 17)% to Vitality
(31 to 40)% Bonus to Defense
Socketed (5)
Defense: (1052 - 1135) to (1691 - 1823)
Required Level: 45
Required Strength: 385
Item Level: 77
+(13 to 16) to Whirlpool
+(104 to 120)% Enhanced Defense
(18 to 20)% to Strength
(18 to 20)% to Dexterity
(18 to 20)% to Vitality
(41 to 50)% Bonus to Defense
Socketed (6)
Earth
Pantheon
(Amazon Bow Set)
→ Earth
Chain Mail (Sacred)
Defense: (5050 - 6312) to (5712 - 7140)
Required Level: 80
Required Strength: 402
Item Level: 1
15% Hit Recovery
Adds 13-25 Damage
(3 to 6)% Life stolen per Hit
+(100 to 150)% Enhanced Defense
(16 to 20)% to Dexterity
Lightning Resist +(31 to 50)%
Requirements -33%
Socketed (6)
Chain Mail (Sacred)
Defense: (5050 - 6312) to (5712 - 7140)
Required Level: 80
Required Strength: 402
Item Level: 1
15% Hit Recovery
Adds 13-25 Damage
(3 to 6)% Life stolen per Hit
+(100 to 150)% Enhanced Defense
(16 to 20)% to Dexterity
Lightning Resist +(31 to 50)%
Requirements -33%
Socketed (6)
Pantheon
(Amazon Bow Set)
Strength Beyond Strength
Strength Beyond Strength
Gothic Plate (Sacred)
Defense: (8339 - 9198) to (10115 - 11157)
Required Level: 100
Required Strength: 675
Item Level: 120
Adds 25-40 Damage
150% Bonus to Attack Rating
+50% Damage to Demons
25% Life stolen per Hit
10% Deadly Strike
+(172 to 200)% Enhanced Defense
1% Reanimate as: Random Monster
-5 to Light Radius
Socketed (6)
Helm:
Honor
→ Honor
Helms
'Tal'
Runeword Level: 20
7% Movement Speed
+7% to Spell Damage
Elemental Resists +7%
Poison Length Reduced by (10 to 15)%
-7% to All Vendor Prices
Helms
'Tal'
Runeword Level: 20
7% Movement Speed
+7% to Spell Damage
Elemental Resists +7%
Poison Length Reduced by (10 to 15)%
-7% to All Vendor Prices
Topspin
→ Topspin
Skull Cap (4)
Defense: (76 - 83) to (115 - 125)
Required Level: 3
Required Strength: 28
Item Level: 1
5% Attack Speed
+(31 to 50)% Enhanced Defense
+(31 to 50) Defense
(3 to 5)% to Dexterity
(3 to 5)% to Energy
Maximum Elemental Resists +1%
10% Bonus to Defense
Socketed (1)
Defense: (277 - 301) to (365 - 397)
Required Level: 20
Required Strength: 55
Item Level: 31
15% Attack Speed
+(61 to 80)% Enhanced Defense
+(71 to 100) Defense
(6 to 8)% to Dexterity
(6 to 8)% to Energy
Maximum Elemental Resists +1%
20% Bonus to Defense
Socketed (3)
Defense: (704 - 760) to (876 - 943)
Required Level: 37
Required Strength: 192
Item Level: 51
25% Attack Speed
+(91 to 110)% Enhanced Defense
+(151 to 200) Defense
(9 to 11)% to Dexterity
(9 to 11)% to Energy
Maximum Elemental Resists +2%
30% Bonus to Defense
Socketed (4)
Defense: (1182 - 1258) to (1471 - 1564)
Required Level: 47
Required Strength: 384
Item Level: 77
30% Attack Speed
+(121 to 140)% Enhanced Defense
+(301 to 400) Defense
(12 to 14)% to Dexterity
(12 to 14)% to Energy
Maximum Elemental Resists +2%
40% Bonus to Defense
Socketed (4)
Witchhunter's Hood
Witchhunter's Attire
(Assassin Claw Set)
→ Witchhunter's Hood
Cap (Sacred)
Defense: (2136 - 2611) to (2161 - 2642)
Required Level: 90
Required Strength: 250
Item Level: 1
+(80 to 120)% Enhanced Defense
10% to Strength
10% to Dexterity
Maximum Elemental Resists +1%
Elemental Resists +(31 to 40)%
Physical Resist 5%
(16 to 20)% Bonus to Defense
Requirements -50%
Socketed (4)
Witchhunter's Attire
(Assassin Claw Set)
Royal Circlet
Royal Circlet
Tiara (Sacred)
Defense: (1740 - 1957) to (1968 - 2214)
Required Level: 100
Required Dexterity: 392
Item Level: 105
+2 to All Skills
+50% Damage to Demons
+50% Damage to Undead
+(140 to 170)% Enhanced Defense
(21 to 25)% to All Attributes
Elemental Resists +(25 to 30)%
Physical Resist 5%
(21 to 25)% Magic Find
Socketed (4)
Belt:
Rainbow
→ Rainbow
Belts
'Eth'
Runeword Level: 15
+5% to Spell Damage
+(6 to 10)% to Summoned Minion Resistances
Regenerate Mana +(5 to 10)%
Elemental Resists +(10 to 15)%
(6 to 8)% Magic Find
+2 to Light Radius
Belts
'Eth'
Runeword Level: 15
+5% to Spell Damage
+(6 to 10)% to Summoned Minion Resistances
Regenerate Mana +(5 to 10)%
Elemental Resists +(10 to 15)%
(6 to 8)% Magic Find
+2 to Light Radius
Wormtongue
→ Wormtongue
Light Belt (4)
Defense: (53 - 58) to (71 - 78)
Required Level: 3
Required Strength: 26
Item Level: 1
(31 to 50)% Bonus to Attack Rating
Adds 5-13 Poison Damage over 2 seconds
(2 to 4)% Life stolen per Hit
+(18 to 29)% Enhanced Defense
+(11 to 15) to Dexterity
Socketed (1)
Defense: (214 - 231) to (259 - 279)
Required Level: 21
Required Strength: 55
Item Level: 31
(71 to 90)% Bonus to Attack Rating
Adds 19-50 Poison Damage over 2 seconds
(8 to 10)% Life stolen per Hit
+(41 to 52)% Enhanced Defense
+(21 to 25) to Dexterity
Socketed (2)
Defense: (544 - 581) to (649 - 693)
Required Level: 38
Required Strength: 192
Item Level: 51
(111 to 130)% Bonus to Attack Rating
Adds 75-150 Poison Damage over 2 seconds
(14 to 16)% Life stolen per Hit
+(64 to 75)% Enhanced Defense
+(31 to 35) to Dexterity
Socketed (2)
Defense: (801 - 851) to (946 - 1006)
Required Level: 46
Required Strength: 384
Item Level: 77
(131 to 150)% Bonus to Attack Rating
Adds 100-250 Poison Damage over 2 seconds
(17 to 19)% Life stolen per Hit
+(75 to 86)% Enhanced Defense
+(36 to 40) to Dexterity
Socketed (2)
The Endless Loop
The Endless Loop
Light Belt (Sacred)
Defense: 1101 to 1143
Required Level: 100
Required Strength: 550
Item Level: 105
40% Combat Speeds
+(10 to 19) to Charged Strike
Slow Target 10%
+50 to all Attributes
+75 Life Regenerated per Second
+(0 to 1) Mana on Striking
Socketed (2)
Light Belt (Sacred)
Defense: 1101 to 1143
Required Level: 100
Required Strength: 550
Item Level: 105
40% Combat Speeds
+(10 to 19) to Charged Strike
Slow Target 10%
+50 to all Attributes
+75 Life Regenerated per Second
+(0 to 1) Mana on Striking
Socketed (2)
Gloves:
Enlightenment
→ Enlightenment
Gloves
'El'
Runeword Level: 6
10% Combat Speeds
2% Life stolen per Hit
2% Mana stolen per Hit
+5 to all Attributes
+(3 to 5) Life Regenerated per Second
Lightning Resist +15%
+(4 to 6) to Light Radius
Gloves
'El'
Runeword Level: 6
10% Combat Speeds
2% Life stolen per Hit
2% Mana stolen per Hit
+5 to all Attributes
+(3 to 5) Life Regenerated per Second
Lightning Resist +15%
+(4 to 6) to Light Radius
Featherclaw
→ Water
Pantheon
(Amazon Bow Set)
→ Water
Leather Gloves (Sacred)
Defense: (940 - 1175) to (954 - 1192)
Required Level: 80
Required Strength: 335
Item Level: 1
+(100 to 150)% Enhanced Defense
(11 to 15)% to Strength
(11 to 15)% to Dexterity
Fire Resist +(31 to 50)%
(13 to 19)% Gold Find
Requirements -33%
Socketed (4)
Leather Gloves (Sacred)
Defense: (940 - 1175) to (954 - 1192)
Required Level: 80
Required Strength: 335
Item Level: 1
+(100 to 150)% Enhanced Defense
(11 to 15)% to Strength
(11 to 15)% to Dexterity
Fire Resist +(31 to 50)%
(13 to 19)% Gold Find
Requirements -33%
Socketed (4)
Pantheon
(Amazon Bow Set)
Rogue Foresight
Rogue Foresight
Heavy Gloves (Sacred)
Defense: 492 to 522
Required Level: 100
Required Strength: 525
Item Level: 120
+1 to All Skills
5% Deadly Strike
-10% to Strength
20% to Dexterity
Physical Resist 5%
Socketed (4)
Heavy Gloves (Sacred)
Defense: 492 to 522
Required Level: 100
Required Strength: 525
Item Level: 120
+1 to All Skills
5% Deadly Strike
-10% to Strength
20% to Dexterity
Physical Resist 5%
Socketed (4)
Boots:
Epicenter
→ Epicenter
Boots
'Ith'
Runeword Level: 18
0.0625% Chance of Crushing Blow (Based on Character Level)
+(4 to 15)% Enhanced Defense
+(40 to 60) to Life
Elemental Resists +(3 to 5)%
Boots
'Ith'
Runeword Level: 18
0.0625% Chance of Crushing Blow (Based on Character Level)
+(4 to 15)% Enhanced Defense
+(40 to 60) to Life
Elemental Resists +(3 to 5)%
Death Spur
→ Death Spur
Heavy Boots (4)
Defense: 27 to 39
Required Level: 3
Required Strength: 27
Item Level: 1
1% Chance to cast level 6 Spike Nova on Kill
(10 to 40)% Movement Speed
+0.09375 to Maximum Damage (Based on Character Level)
+(11 to 15) to Strength
+(11 to 15) to Dexterity
Socketed (1)
Defense: 109 to 141
Required Level: 20
Required Strength: 55
Item Level: 31
1% Chance to cast level 10 Spike Nova on Kill
(10 to 40)% Movement Speed
+0.15625 to Maximum Damage (Based on Character Level)
+(21 to 25) to Strength
+(21 to 25) to Dexterity
Socketed (2)
Defense: 248 to 310
Required Level: 38
Required Strength: 193
Item Level: 51
1% Chance to cast level 14 Spike Nova on Kill
(10 to 40)% Movement Speed
+0.21875 to Maximum Damage (Based on Character Level)
+(31 to 35) to Strength
+(31 to 35) to Dexterity
Socketed (3)
Defense: 346 to 427
Required Level: 46
Required Strength: 386
Item Level: 77
1% Chance to cast level 16 Spike Nova on Kill
(10 to 40)% Movement Speed
+0.25 to Maximum Damage (Based on Character Level)
+(36 to 40) to Strength
+(36 to 40) to Dexterity
Socketed (4)
Frost
Pantheon
(Amazon Bow Set)
→ Frost
Boots (Sacred)
Defense: (1302 - 1627) to (1342 - 1677)
Required Level: 80
Required Strength: 335
Item Level: 1
(10 to 40)% Movement Speed
30% Hit Recovery
+(100 to 150)% Enhanced Defense
(11 to 15)% to Strength
(11 to 15)% to Dexterity
Cold Resist +(31 to 50)%
(11 to 13)% Magic Find
Requirements -33%
Socketed (4)
Pantheon
(Amazon Bow Set)
Wind Runner


Wind Runner
Boots
'SilElqSilGul'
Runeword Level: 100
+(0 to 1) to All Skills
50% Attack Speed
10% Movement Speed
Adds 25-68 Damage
250% Bonus to Attack Rating
(12 to 15)% Life stolen per Hit
+(171 to 200)% Enhanced Defense
Boots
'SilElqSilGul'
Runeword Level: 100
+(0 to 1) to All Skills
50% Attack Speed
10% Movement Speed
Adds 25-68 Damage
250% Bonus to Attack Rating
(12 to 15)% Life stolen per Hit
+(171 to 200)% Enhanced Defense
Amulet: Rare with +Skills and any combination of DEX, AS, Life, or a Reanimate →
Scarab of Death
Scarab of Death
Amulet
Required Level: 40
Item Level: 70
50% Attack Speed
50% Cast Speed
50% Hit Recovery
Elemental Resists +25%
Physical Resist -5%
5% Reanimate as: Random Monster
Amulet
Required Level: 40
Item Level: 70
50% Attack Speed
50% Cast Speed
50% Hit Recovery
Elemental Resists +25%
Physical Resist -5%
5% Reanimate as: Random Monster
SOCKET FILLERS
Weapon: Skulls → Jah Runes
Armor: Res Gems → Amethysts
MYSTIC ORBS
Weapon: ED to cap → Max Damage → AS (if needed)
Armor: Elemental Res → HR → Max Damage
Amulet: Phys DR → Life → MF
► BREAKPOINTS
BREAKPOINTS
Attack Speed (AS):
6/15/26/40/65/102/180 (8 fpa) – Short, Hunter's, Composite, Short Battle, Short War Bows
5/10/18/29/42/60/92/142/259 (8 fpa) – Long, Long Battle, Long War Bows
5/11/22/34/50/78/120/215 (8 fpa) – Stag and Reflex Bows
Hit Recovery (HR):
6/13/20/32/52/86/174/600 (3 fpa)
Attack Speed (AS):
6/15/26/40/65/102/180 (8 fpa) – Short, Hunter's, Composite, Short Battle, Short War Bows
5/10/18/29/42/60/92/142/259 (8 fpa) – Long, Long Battle, Long War Bows
5/11/22/34/50/78/120/215 (8 fpa) – Stag and Reflex Bows
Hit Recovery (HR):
6/13/20/32/52/86/174/600 (3 fpa)
► NOTES ON MERCS
The following applies to all mercs.
- Have an innate +70% Elemental Res.
- Gain +1% Max Res per 10 clvls abouve clvl 100.
- Suffer from the same Res penalties in Nightmare and Hell that you do.
- Inherit both your Gold Find and Magic Find as long as they get the kill (it does not work the other way around).
- Benefit from the +Skills mod on their gear. However, they do not benefit from "+x to skill y" mods.
- Cannot use oskills.
- When your merc gets stuck, teleport or TP to town to fix them. If that doesn’t work, teleport right next to a monster. This will almost always reactivate their AI.

GEAR
► expand
GEAR
Weapon: Any Sorc Orb with decent damage/mods →
Armor:
Shield: Rare →
Helm: Rare →
Belt:
Gloves:
Boots:
Amulet: Rare with +Skills, Life, Res, and MF →
Rings: Rare with +Skills, Life, Res, and MF or
On Switch:
SOCKET FILLERS
Weapon: Rubies → Sapphires → Skulls
Armor (except Shield): Res Gems (Amber, Bloodstone, Onyx, Turquoise) → Amethysts
Armor (Shield): Res Gems (Emerald, Ruby, Sapphire, Topaz)
All RWs: Any Jewels with decent mods (as needed)
MYSTIC ORBS*
Weapon (TU): ED to cap → Max Damage → DS → LoMA
Armor (TU Body Armor, Shield, Belt): ED to cap → DEX → Max Damage → Life Regen
Armor (TU Helm): HR → STR → Max Damage → Life Regen
Armor (TU Gloves, Boots): DEX → Max Damage → HR → Life Regen
Jewelry: Poison Length Reduction → MF. Add Mana Regen if you feel you need it.
*Only orb TU gear at T4 to save gold.
Weapon: Any Sorc Orb with decent damage/mods →
Shark
in a Warp Blade (not Crystal Sword) → Shark
Weapons
Except Necromancer Daggers, Assassin Claws
'Eld'
Runeword Level: 8
5% Chance to cast level 9 Bloodlust on Kill
+(7 to 9)% Bonus Damage to Bloodlust
20% Attack Speed
+5 to Maximum Damage
+0.125 to Maximum Damage (Based on Character Level)
1.5% Bonus to Attack Rating (Based on Character Level)
+(24 to 35)% Enhanced Damage
-1 to Mana
The Warped Blade
The Warped Blade
Warp Blade (4)
One-Hand Damage: (8 - 10) to (25 - 39)
(Sorceress Only)
Required Level: 12
Required Dexterity: 39 to 41
Item Level: 10
Dexterity Damage Bonus: (0.13 per Dexterity)%
Area Effect Attack
5% Chance to cast level 12 Energy Beam on Melee Attack
15% Attack Speed
+(13 to 25) to Maximum Damage
+(24 to 46)% Enhanced Damage
+(16 to 25) to Dexterity
2% Reanimate as: Random Monster
Requirements -(11 to 15)%
Socketed (2)
One-Hand Damage: (25 - 28) to (78 - 96)
(Sorceress Only)
Required Level: 33
Required Dexterity: 53 to 56
Item Level: 31
Dexterity Damage Bonus: (0.13 per Dexterity)%
Area Effect Attack
10% Chance to cast level 20 Energy Beam on Melee Attack
25% Attack Speed
+(38 to 50) to Maximum Damage
+(69 to 92)% Enhanced Damage
+(36 to 45) to Dexterity
4% Reanimate as: Random Monster
Requirements -(21 to 25)%
Socketed (4)
One-Hand Damage: (49 - 54) to (157 - 179)
(Sorceress Only)
Required Level: 52
Required Dexterity: 91 to 96
Item Level: 51
Dexterity Damage Bonus: (0.13 per Dexterity)%
Area Effect Attack
15% Chance to cast level 28 Energy Beam on Melee Attack
35% Attack Speed
+(63 to 75) to Maximum Damage
+(115 to 137)% Enhanced Damage
+(56 to 65) to Dexterity
6% Reanimate as: Random Monster
Requirements -(31 to 35)%
Socketed (5)
One-Hand Damage: (69 - 75) to (202 - 225)
(Sorceress Only)
Required Level: 62
Required Dexterity: 166 to 177
Item Level: 77
Dexterity Damage Bonus: (0.13 per Dexterity)%
Area Effect Attack
20% Chance to cast level 36 Energy Beam on Melee Attack
40% Attack Speed
+(76 to 88) to Maximum Damage
+(138 to 160)% Enhanced Damage
+(66 to 75) to Dexterity
8% Reanimate as: Random Monster
Requirements -(36 to 40)%
Socketed (6)
Armor:
Akara's Robe (1)
→ Akara's Robe
Quilted Armor (1)
Defense: 74 to 100
Required Level: 10
Required Strength: 10
Item Level: 255
+50 Defense
+(6 to 10) to all Attributes
+50 to Life
Elemental Resists +(11 to 15)%
Cannot be Upgraded
Socketed (2)
Quilted Armor (1)
Defense: 74 to 100
Required Level: 10
Required Strength: 10
Item Level: 255
+50 Defense
+(6 to 10) to all Attributes
+50 to Life
Elemental Resists +(11 to 15)%
Cannot be Upgraded
Socketed (2)
Wedding Dress of the Zann
Wedding Dress of the Zann
Ceremonial Armor (4)
Defense: (352 - 409) to (706 - 821)
(Sorceress Only)
Required Level: 12
Required Dexterity: 97
Item Level: 29
15% Attack Speed
+(2 to 3) to Spiral Dance
4% Deadly Strike
+(35 to 57)% Enhanced Defense
+(16 to 25) to Strength
+(16 to 25) to Dexterity
Socketed (2)
Defense: (1131 - 1268) to (2161 - 2423)
(Sorceress Only)
Required Level: 31
Required Dexterity: 143
Item Level: 40
30% Attack Speed
+(4 to 5) to Spiral Dance
6% Deadly Strike
+(81 to 103)% Enhanced Defense
+(36 to 45) to Strength
+(36 to 45) to Dexterity
Socketed (4)
Defense: (2818 - 3105) to (5286 - 5824)
(Sorceress Only)
Required Level: 48
Required Dexterity: 300
Item Level: 67
45% Attack Speed
+(6 to 7) to Spiral Dance
8% Deadly Strike
+(126 to 149)% Enhanced Defense
+(56 to 65) to Strength
+(56 to 65) to Dexterity
Socketed (5)
Defense: (4203 - 4574) to (7888 - 8585)
(Sorceress Only)
Required Level: 55
Required Dexterity: 622
Item Level: 85
60% Attack Speed
+(7 to 8) to Spiral Dance
10% Deadly Strike
+(149 to 171)% Enhanced Defense
+(66 to 75) to Strength
+(66 to 75) to Dexterity
Socketed (6)
Shield: Rare →
Cloudladder
Cloudladder
Spiked Shield (4)
Defense: (102 - 116) to (203 - 230)
Chance to Block: Class%
Required Level: 7
Required Dexterity: 55
Item Level: 10
+1 to All Skills
+1 to Druid Skill Levels
+1 to Sorceress Skill Levels
+(41 to 60)% Enhanced Defense
+20 to all Attributes
+10 Life Regenerated per Second
Socketed (1)
Defense: (372 - 414) to (629 - 699)
Chance to Block: Class%
Required Level: 24
Required Dexterity: 81
Item Level: 36
+(1 to 2) to All Skills
+(1 to 2) to Druid Skill Levels
+(1 to 2) to Sorceress Skill Levels
+(71 to 90)% Enhanced Defense
+30 to all Attributes
+20 Life Regenerated per Second
Socketed (4)
Defense: (920 - 1007) to (1503 - 1645)
Chance to Block: Class%
Required Level: 42
Required Dexterity: 170
Item Level: 51
+2 to All Skills
+2 to Druid Skill Levels
+2 to Sorceress Skill Levels
+(101 to 120)% Enhanced Defense
+40 to all Attributes
+30 Life Regenerated per Second
Socketed (5)
Defense: (1443 - 1687) to (2346 - 2743)
Chance to Block: Class%
Required Level: 51
Required Dexterity: 353
Item Level: 85
+2 to All Skills
+2 to Druid Skill Levels
+2 to Sorceress Skill Levels
+(131 to 170)% Enhanced Defense
+50 to all Attributes
+40 Life Regenerated per Second
Socketed (6)
Helm: Rare →
Haareis
Haareis
Diadem (4)
Defense: 36 to 80
Required Level: 10
Required Dexterity: 28
Item Level: 1
1% Chance to cast level 1 Shackles of Ice on Melee Attack
Adds 5-7 Cold Damage
(2 to 4)% Life stolen per Hit
(4 to 6)% to Strength
(4 to 6)% to Dexterity
(4 to 6)% to Vitality
Cold Resist +(16 to 25)%
Socketed (2)
Defense: 103 to 194
Required Level: 28
Required Dexterity: 57
Item Level: 31
2% Chance to cast level 5 Shackles of Ice on Melee Attack
Adds 18-20 Cold Damage
(8 to 10)% Life stolen per Hit
(7 to 9)% to Strength
(7 to 9)% to Dexterity
(7 to 9)% to Vitality
Cold Resist +(36 to 45)%
Socketed (2)
Defense: 215 to 386
Required Level: 46
Required Dexterity: 137
Item Level: 51
3% Chance to cast level 9 Shackles of Ice on Melee Attack
Adds 55-65 Cold Damage
(14 to 16)% Life stolen per Hit
(10 to 12)% to Strength
(10 to 12)% to Dexterity
(10 to 12)% to Vitality
Cold Resist +(56 to 65)%
Socketed (3)
Defense: 296 to 523
Required Level: 54
Required Dexterity: 294
Item Level: 77
4% Chance to cast level 11 Shackles of Ice on Melee Attack
Adds 175-190 Cold Damage
(17 to 19)% Life stolen per Hit
(13 to 15)% to Strength
(13 to 15)% to Dexterity
(13 to 15)% to Vitality
Cold Resist +(66 to 75)%
Socketed (4)
Belt:
Rainbow
→ Rainbow
Belts
'Eth'
Runeword Level: 15
+5% to Spell Damage
+(6 to 10)% to Summoned Minion Resistances
Regenerate Mana +(5 to 10)%
Elemental Resists +(10 to 15)%
(6 to 8)% Magic Find
+2 to Light Radius
Belts
'Eth'
Runeword Level: 15
+5% to Spell Damage
+(6 to 10)% to Summoned Minion Resistances
Regenerate Mana +(5 to 10)%
Elemental Resists +(10 to 15)%
(6 to 8)% Magic Find
+2 to Light Radius
Wormtongue
Wormtongue
Light Belt (4)
Defense: (53 - 58) to (71 - 78)
Required Level: 3
Required Strength: 26
Item Level: 1
(31 to 50)% Bonus to Attack Rating
Adds 5-13 Poison Damage over 2 seconds
(2 to 4)% Life stolen per Hit
+(18 to 29)% Enhanced Defense
+(11 to 15) to Dexterity
Socketed (1)
Defense: (214 - 231) to (259 - 279)
Required Level: 21
Required Strength: 55
Item Level: 31
(71 to 90)% Bonus to Attack Rating
Adds 19-50 Poison Damage over 2 seconds
(8 to 10)% Life stolen per Hit
+(41 to 52)% Enhanced Defense
+(21 to 25) to Dexterity
Socketed (2)
Defense: (544 - 581) to (649 - 693)
Required Level: 38
Required Strength: 192
Item Level: 51
(111 to 130)% Bonus to Attack Rating
Adds 75-150 Poison Damage over 2 seconds
(14 to 16)% Life stolen per Hit
+(64 to 75)% Enhanced Defense
+(31 to 35) to Dexterity
Socketed (2)
Defense: (801 - 851) to (946 - 1006)
Required Level: 46
Required Strength: 384
Item Level: 77
(131 to 150)% Bonus to Attack Rating
Adds 100-250 Poison Damage over 2 seconds
(17 to 19)% Life stolen per Hit
+(75 to 86)% Enhanced Defense
+(36 to 40) to Dexterity
Socketed (2)
Gloves:
Enlightenment
→ Enlightenment
Gloves
'El'
Runeword Level: 6
10% Combat Speeds
2% Life stolen per Hit
2% Mana stolen per Hit
+5 to all Attributes
+(3 to 5) Life Regenerated per Second
Lightning Resist +15%
+(4 to 6) to Light Radius
Gloves
'El'
Runeword Level: 6
10% Combat Speeds
2% Life stolen per Hit
2% Mana stolen per Hit
+5 to all Attributes
+(3 to 5) Life Regenerated per Second
Lightning Resist +15%
+(4 to 6) to Light Radius
Visegrip
Visegrip
Light Gauntlets (4)
Defense: 29 to 56
Required Level: 6
Required Strength: 30
Item Level: 10
5% Chance to cast level 5 Crucify on Melee Attack
+(3 to 4) to Maximum Damage
(21 to 50)% Bonus to Attack Rating
(4 to 5)% to Strength
2% to Dexterity
Socketed (1)
Defense: 120 to 176
Required Level: 24
Required Strength: 60
Item Level: 31
6% Chance to cast level 10 Crucify on Melee Attack
+(6 to 7) to Maximum Damage
(75 to 100)% Bonus to Attack Rating
(8 to 9)% to Strength
(3 to 4)% to Dexterity
Socketed (2)
Defense: 273 to 381
Required Level: 41
Required Strength: 210
Item Level: 51
7% Chance to cast level 19 Crucify on Melee Attack
+(8 to 9) to Maximum Damage
(105 to 125)% Bonus to Attack Rating
(12 to 13)% to Strength
(5 to 7)% to Dexterity
Socketed (3)
Defense: 375 to 522
Required Level: 50
Required Strength: 420
Item Level: 77
8% Chance to cast level 30 Crucify on Melee Attack
+(9 to 10) to Maximum Damage
(130 to 150)% Bonus to Attack Rating
(14 to 15)% to Strength
(8 to 10)% to Dexterity
Socketed (4)
Boots:
Epicenter
→ Epicenter
Boots
'Ith'
Runeword Level: 18
0.0625% Chance of Crushing Blow (Based on Character Level)
+(4 to 15)% Enhanced Defense
+(40 to 60) to Life
Elemental Resists +(3 to 5)%
Boots
'Ith'
Runeword Level: 18
0.0625% Chance of Crushing Blow (Based on Character Level)
+(4 to 15)% Enhanced Defense
+(40 to 60) to Life
Elemental Resists +(3 to 5)%
Death Spur
Death Spur
Heavy Boots (4)
Defense: 27 to 39
Required Level: 3
Required Strength: 27
Item Level: 1
1% Chance to cast level 6 Spike Nova on Kill
(10 to 40)% Movement Speed
+0.09375 to Maximum Damage (Based on Character Level)
+(11 to 15) to Strength
+(11 to 15) to Dexterity
Socketed (1)
Defense: 109 to 141
Required Level: 20
Required Strength: 55
Item Level: 31
1% Chance to cast level 10 Spike Nova on Kill
(10 to 40)% Movement Speed
+0.15625 to Maximum Damage (Based on Character Level)
+(21 to 25) to Strength
+(21 to 25) to Dexterity
Socketed (2)
Defense: 248 to 310
Required Level: 38
Required Strength: 193
Item Level: 51
1% Chance to cast level 14 Spike Nova on Kill
(10 to 40)% Movement Speed
+0.21875 to Maximum Damage (Based on Character Level)
+(31 to 35) to Strength
+(31 to 35) to Dexterity
Socketed (3)
Defense: 346 to 427
Required Level: 46
Required Strength: 386
Item Level: 77
1% Chance to cast level 16 Spike Nova on Kill
(10 to 40)% Movement Speed
+0.25 to Maximum Damage (Based on Character Level)
+(36 to 40) to Strength
+(36 to 40) to Dexterity
Socketed (4)
Amulet: Rare with +Skills, Life, Res, and MF →
Vizjerei Judgment
Vizjerei Dominion
(Sorceress Arcane Set)
Vizjerei Judgment
Amulet
(Sorceress Only)
Required Level: 90
Item Level: 90
+1 to Sorceress Skill Levels
(20 to 30)% Cast Speed
+(800 to 1200) to Mana
Elemental Resists +(20 to 30)%
Amulet
(Sorceress Only)
Required Level: 90
Item Level: 90
+1 to Sorceress Skill Levels
(20 to 30)% Cast Speed
+(800 to 1200) to Mana
Elemental Resists +(20 to 30)%
Vizjerei Dominion
(Sorceress Arcane Set)
Rings: Rare with +Skills, Life, Res, and MF or
Ring of Regha
Ring of Regha
Ring
Item Level: 1
Adds 3-5 Damage
+5% to Spell Damage
+(5 to 15) to Strength
+(5 to 15) to Dexterity
Elemental Resists +10%
Ring
Item Level: 1
Adds 3-5 Damage
+5% to Spell Damage
+(5 to 15) to Strength
+(5 to 15) to Dexterity
Elemental Resists +10%
On Switch:
Pax Mystica
(Blink oskill)Pax Mystica
Staves
'Tir'
Runeword Level: 10
+1 to All Skills
+7% to Spell Damage
+(2 to 5) to Blink
Elemental Resists +(11 to 15)%
(11 to 13)% Magic Find
Staves
'Tir'
Runeword Level: 10
+1 to All Skills
+7% to Spell Damage
+(2 to 5) to Blink
Elemental Resists +(11 to 15)%
(11 to 13)% Magic Find
SOCKET FILLERS
Weapon: Rubies → Sapphires → Skulls
Armor (except Shield): Res Gems (Amber, Bloodstone, Onyx, Turquoise) → Amethysts
Armor (Shield): Res Gems (Emerald, Ruby, Sapphire, Topaz)
All RWs: Any Jewels with decent mods (as needed)
MYSTIC ORBS*
Weapon (TU): ED to cap → Max Damage → DS → LoMA
Armor (TU Body Armor, Shield, Belt): ED to cap → DEX → Max Damage → Life Regen
Armor (TU Helm): HR → STR → Max Damage → Life Regen
Armor (TU Gloves, Boots): DEX → Max Damage → HR → Life Regen
Jewelry: Poison Length Reduction → MF. Add Mana Regen if you feel you need it.
*Only orb TU gear at T4 to save gold.
NORMAL (CLVL 1-55)
ATTRIBUTE POINTS
30 points into STR (40 Base STR) → everything else into DEX.
SKILL POINTS
Spec into Meditation once you unlock Bladestorm. After which, boost Melee skills at a 1:1 or 2:1 ratio vs. Coven skills, depending on how comfortable you feel. Spec out of Meditation before moving on to Act 5.
GEARING
Look for Rare gear with Life, Life sustain, Life regen, Poison and Fire Res, DEX, and MF.
RANDOM WORLD DROPS
Useful items that can drop at any point.
- Belladonna Extracts
Single-use potions that let you respec. - Relics
Rare drops that give you access to a random oskill, plus some secondary benefits. You can carry up to 3 different Relics at a time.
GOBLINS
Rare monsters that can spawn at any point. The types of items they drop depend on the Goblin type, but they’ll usually drop something useful. Goblins in higher Difficulties drop better items.
PROGRESSION NOTES
- Complete all main storyline quests.
- Collect a few Jewels.
- Collect all Runes.
- Collect and upgrade all Gems.
- You can create containers for Runes, Gems, Shrines, and Arcane Crystals by cubing one with an Oil of Craft. Right-click containers to store items. Cube containers to pull items out of storage.
- Akara offers unlimited respecs to characters below clvl 50, so don’t worry if you mess something up early on.
► WALKTHROUGH
ACT 1
Your Staff is fine when starting out. Upgrade to a Sorc Orb when you find one with good mods (they’re faster than Staves).
If you haven’t found a Warp Blade (not Crystal Sword) by the time you reach the Monastery, gamble one. Cube it with an Oil of Renewal to reroll it as a Superior base. If it rolls with 2 sockets, insert a Jewel, then an Eld Rune to make
ANDARIEL
Her full-screen Meteor Shower is extremely dangerous because your HR sucks. Retreat immediately when you see it telegraphed. You can mostly ignore her poison nova thing.
Andariel has a guaranteed 1x TU drop. She also drops the Catalyst of Disenchantment. Use it to turn any spare TUs (except quest items) into Arcane Shards. Cubing 5 Shards will create an Arcane Crystal, which will be useful throughout the game. Don’t use this Catalyst on Unique Amulets, Rings, or Jewels. You can turn those into something more valuable later.
ACT 2
Have
DURIEL
He’s fast and aggressive, but you can just melee him. The falling rocks will take about 30% of your Life per hit, so move when they start falling on your head.
Before leaving the Act, speak with Jerhyn. He’ll reward you with an Arcane Crystal.
ACT 3
As you put more points into DEX, the increasing NRG boost from Nova Charge will gradually make Mana costs less annoying.
Be wary when getting Khalim’s Eye in the Spider Cavern. Sszark the Burning casts long-lasting fire rings that deal decent damage.
Upon completing the Gidbinn quest, Ormus will reward you with random Shrines. Hold onto them. Even if they’re Shrines you won’t use, they can be converted to useful Shrines later on.
Speak to Cain after killing the High Council, but before entering Mephisto’s Durance, and he’ll give you a second Arcane Crystal.
MEPHISTO
As long as you don’t just stand in his nova ring thing like an idiot, you can just melee him. Mephisto has a guaranteed 2x TU drop.
If you found
ACT 4
Additional Fire Res is recommended.
In the Chaos Sanctuary, three of the seals will release a Superunique enemy:
DIABLO
His Flamestrike can deal decent damage if your Fire Res is low. Otherwise, just melee him.
Spec out of Meditation before moving on to Act 5. Put those extra points into Nova Charge.
ACT 5
Have at least +45% Elemental Res. Additional Lightning Res is recommended.
Shenk the Overseer will drop a Mark of Infusion, which is used to create Honorific and Sacred Honorific items. Hold onto it.
Watch out for Corrupted Barbarians in the Arreat Plateau. A half dozen can Leap on top of you and kill you before you even realize what happened.
Nihlathak has a guaranteed 2x TU drop.
Lister the Tormentor (final wave of Baal minions) can deal a lot of damage. Be careful.
After killing Lister the Tormentor, enter the rift to Tran Athulua and complete the Level Challenge. Once completed, cube the Sunstone with the Scroll of Elemental Resistance you got from Malah for rescuing Anya.
BAAL
He’s fast, aggressive, and teleports. His cold wave will Chill you, and his beam attack will rapidly drain your Mana. Avoid that. The black circles he spawns on the ground will erupt into large AoE novas that can deal a lot of Phys damage. Avoid those, too. Other than that, just chase him around and melee or AG with Bladestorm.
A 20 minute quest lockout warning will pop up when you enter the Worldstone Chamber. A lockout means you’ll have free access to enter and leave the area only for the time allotted (in this case, for the next 20 minutes). You can stay in the area as long as you want, but if you leave after the timer expires, you won’t be able to reenter the area in that game. In SP, the timer still counts down while the game is paused.
PREPARING FOR NIGHTMARE
Minimum requirements to move on:
Your Staff is fine when starting out. Upgrade to a Sorc Orb when you find one with good mods (they’re faster than Staves).
If you haven’t found a Warp Blade (not Crystal Sword) by the time you reach the Monastery, gamble one. Cube it with an Oil of Renewal to reroll it as a Superior base. If it rolls with 2 sockets, insert a Jewel, then an Eld Rune to make
Shark
. If it rolls with no sockets, cube it with a Jewel to add a socket, then insert an Eld Rune.Shark
Weapons
Except Necromancer Daggers, Assassin Claws
'Eld'
Runeword Level: 8
5% Chance to cast level 9 Bloodlust on Kill
+(7 to 9)% Bonus Damage to Bloodlust
20% Attack Speed
+5 to Maximum Damage
+0.125 to Maximum Damage (Based on Character Level)
1.5% Bonus to Attack Rating (Based on Character Level)
+(24 to 35)% Enhanced Damage
-1 to Mana
ANDARIEL
Her full-screen Meteor Shower is extremely dangerous because your HR sucks. Retreat immediately when you see it telegraphed. You can mostly ignore her poison nova thing.
Andariel has a guaranteed 1x TU drop. She also drops the Catalyst of Disenchantment. Use it to turn any spare TUs (except quest items) into Arcane Shards. Cubing 5 Shards will create an Arcane Crystal, which will be useful throughout the game. Don’t use this Catalyst on Unique Amulets, Rings, or Jewels. You can turn those into something more valuable later.
ACT 2
Have
Rainbow
made before starting out. Any additional Poison Res will be helpful.Rainbow
Belts
'Eth'
Runeword Level: 15
+5% to Spell Damage
+(6 to 10)% to Summoned Minion Resistances
Regenerate Mana +(5 to 10)%
Elemental Resists +(10 to 15)%
(6 to 8)% Magic Find
+2 to Light Radius
Belts
'Eth'
Runeword Level: 15
+5% to Spell Damage
+(6 to 10)% to Summoned Minion Resistances
Regenerate Mana +(5 to 10)%
Elemental Resists +(10 to 15)%
(6 to 8)% Magic Find
+2 to Light Radius
DURIEL
He’s fast and aggressive, but you can just melee him. The falling rocks will take about 30% of your Life per hit, so move when they start falling on your head.
Before leaving the Act, speak with Jerhyn. He’ll reward you with an Arcane Crystal.
ACT 3
As you put more points into DEX, the increasing NRG boost from Nova Charge will gradually make Mana costs less annoying.
Be wary when getting Khalim’s Eye in the Spider Cavern. Sszark the Burning casts long-lasting fire rings that deal decent damage.
Upon completing the Gidbinn quest, Ormus will reward you with random Shrines. Hold onto them. Even if they’re Shrines you won’t use, they can be converted to useful Shrines later on.
Speak to Cain after killing the High Council, but before entering Mephisto’s Durance, and he’ll give you a second Arcane Crystal.
MEPHISTO
As long as you don’t just stand in his nova ring thing like an idiot, you can just melee him. Mephisto has a guaranteed 2x TU drop.
If you found
The Warped Blade
, cube it with an AC to uptier it to Tier 2. If not, gamble a T2 Warp Blade and cube it with an Oil of Enhancement and 2x ACs to create it. Socket it with Rubies.The Warped Blade
Warp Blade (4)
One-Hand Damage: (8 - 10) to (25 - 39)
(Sorceress Only)
Required Level: 12
Required Dexterity: 39 to 41
Item Level: 10
Dexterity Damage Bonus: (0.13 per Dexterity)%
Area Effect Attack
5% Chance to cast level 12 Energy Beam on Melee Attack
15% Attack Speed
+(13 to 25) to Maximum Damage
+(24 to 46)% Enhanced Damage
+(16 to 25) to Dexterity
2% Reanimate as: Random Monster
Requirements -(11 to 15)%
Socketed (2)
One-Hand Damage: (25 - 28) to (78 - 96)
(Sorceress Only)
Required Level: 33
Required Dexterity: 53 to 56
Item Level: 31
Dexterity Damage Bonus: (0.13 per Dexterity)%
Area Effect Attack
10% Chance to cast level 20 Energy Beam on Melee Attack
25% Attack Speed
+(38 to 50) to Maximum Damage
+(69 to 92)% Enhanced Damage
+(36 to 45) to Dexterity
4% Reanimate as: Random Monster
Requirements -(21 to 25)%
Socketed (4)
One-Hand Damage: (49 - 54) to (157 - 179)
(Sorceress Only)
Required Level: 52
Required Dexterity: 91 to 96
Item Level: 51
Dexterity Damage Bonus: (0.13 per Dexterity)%
Area Effect Attack
15% Chance to cast level 28 Energy Beam on Melee Attack
35% Attack Speed
+(63 to 75) to Maximum Damage
+(115 to 137)% Enhanced Damage
+(56 to 65) to Dexterity
6% Reanimate as: Random Monster
Requirements -(31 to 35)%
Socketed (5)
One-Hand Damage: (69 - 75) to (202 - 225)
(Sorceress Only)
Required Level: 62
Required Dexterity: 166 to 177
Item Level: 77
Dexterity Damage Bonus: (0.13 per Dexterity)%
Area Effect Attack
20% Chance to cast level 36 Energy Beam on Melee Attack
40% Attack Speed
+(76 to 88) to Maximum Damage
+(138 to 160)% Enhanced Damage
+(66 to 75) to Dexterity
8% Reanimate as: Random Monster
Requirements -(36 to 40)%
Socketed (6)
ACT 4
Additional Fire Res is recommended.
In the Chaos Sanctuary, three of the seals will release a Superunique enemy:
- Magdha (west) is the most dangerous. Its Flamefront may hit-lock you to death.
- Ghom (east) is moderately durable and its Tremor and Fortress can deal decent damage.
- Iceclaw the Merciless (north) summons minions and attacks from a distance.
DIABLO
His Flamestrike can deal decent damage if your Fire Res is low. Otherwise, just melee him.
Spec out of Meditation before moving on to Act 5. Put those extra points into Nova Charge.
ACT 5
Have at least +45% Elemental Res. Additional Lightning Res is recommended.
Shenk the Overseer will drop a Mark of Infusion, which is used to create Honorific and Sacred Honorific items. Hold onto it.
Watch out for Corrupted Barbarians in the Arreat Plateau. A half dozen can Leap on top of you and kill you before you even realize what happened.
Nihlathak has a guaranteed 2x TU drop.
Lister the Tormentor (final wave of Baal minions) can deal a lot of damage. Be careful.
After killing Lister the Tormentor, enter the rift to Tran Athulua and complete the Level Challenge. Once completed, cube the Sunstone with the Scroll of Elemental Resistance you got from Malah for rescuing Anya.
BAAL
He’s fast, aggressive, and teleports. His cold wave will Chill you, and his beam attack will rapidly drain your Mana. Avoid that. The black circles he spawns on the ground will erupt into large AoE novas that can deal a lot of Phys damage. Avoid those, too. Other than that, just chase him around and melee or AG with Bladestorm.
A 20 minute quest lockout warning will pop up when you enter the Worldstone Chamber. A lockout means you’ll have free access to enter and leave the area only for the time allotted (in this case, for the next 20 minutes). You can stay in the area as long as you want, but if you leave after the timer expires, you won’t be able to reenter the area in that game. In SP, the timer still counts down while the game is paused.
PREPARING FOR NIGHTMARE
Minimum requirements to move on:
- All RW gear made.
- The Warped Blade[T3] – Make sure you use an Oil of Disjunction to remove all socket fillers before uptiering.The Warped Blade
Warp Blade (4)
One-Hand Damage: (8 - 10) to (25 - 39)
(Sorceress Only)
Required Level: 12
Required Dexterity: 39 to 41
Item Level: 10
Dexterity Damage Bonus: (0.13 per Dexterity)%
Area Effect Attack
5% Chance to cast level 12 Energy Beam on Melee Attack
15% Attack Speed
+(13 to 25) to Maximum Damage
+(24 to 46)% Enhanced Damage
+(16 to 25) to Dexterity
2% Reanimate as: Random Monster
Requirements -(11 to 15)%
Socketed (2)
One-Hand Damage: (25 - 28) to (78 - 96)
(Sorceress Only)
Required Level: 33
Required Dexterity: 53 to 56
Item Level: 31
Dexterity Damage Bonus: (0.13 per Dexterity)%
Area Effect Attack
10% Chance to cast level 20 Energy Beam on Melee Attack
25% Attack Speed
+(38 to 50) to Maximum Damage
+(69 to 92)% Enhanced Damage
+(36 to 45) to Dexterity
4% Reanimate as: Random Monster
Requirements -(21 to 25)%
Socketed (4)
One-Hand Damage: (49 - 54) to (157 - 179)
(Sorceress Only)
Required Level: 52
Required Dexterity: 91 to 96
Item Level: 51
Dexterity Damage Bonus: (0.13 per Dexterity)%
Area Effect Attack
15% Chance to cast level 28 Energy Beam on Melee Attack
35% Attack Speed
+(63 to 75) to Maximum Damage
+(115 to 137)% Enhanced Damage
+(56 to 65) to Dexterity
6% Reanimate as: Random Monster
Requirements -(31 to 35)%
Socketed (5)
One-Hand Damage: (69 - 75) to (202 - 225)
(Sorceress Only)
Required Level: 62
Required Dexterity: 166 to 177
Item Level: 77
Dexterity Damage Bonus: (0.13 per Dexterity)%
Area Effect Attack
20% Chance to cast level 36 Energy Beam on Melee Attack
40% Attack Speed
+(76 to 88) to Maximum Damage
+(138 to 160)% Enhanced Damage
+(66 to 75) to Dexterity
8% Reanimate as: Random Monster
Requirements -(36 to 40)%
Socketed (6) - Cloudladder[T3] – If you already have it, uptier it to T3. Otherwise, gamble a T3 Spiked Shield and make it.Cloudladder
Spiked Shield (4)
Defense: (102 - 116) to (203 - 230)
Chance to Block: Class%
Required Level: 7
Required Dexterity: 55
Item Level: 10
+1 to All Skills
+1 to Druid Skill Levels
+1 to Sorceress Skill Levels
+(41 to 60)% Enhanced Defense
+20 to all Attributes
+10 Life Regenerated per Second
Socketed (1)
Defense: (372 - 414) to (629 - 699)
Chance to Block: Class%
Required Level: 24
Required Dexterity: 81
Item Level: 36
+(1 to 2) to All Skills
+(1 to 2) to Druid Skill Levels
+(1 to 2) to Sorceress Skill Levels
+(71 to 90)% Enhanced Defense
+30 to all Attributes
+20 Life Regenerated per Second
Socketed (4)
Defense: (920 - 1007) to (1503 - 1645)
Chance to Block: Class%
Required Level: 42
Required Dexterity: 170
Item Level: 51
+2 to All Skills
+2 to Druid Skill Levels
+2 to Sorceress Skill Levels
+(101 to 120)% Enhanced Defense
+40 to all Attributes
+30 Life Regenerated per Second
Socketed (5)
Defense: (1443 - 1687) to (2346 - 2743)
Chance to Block: Class%
Required Level: 51
Required Dexterity: 353
Item Level: 85
+2 to All Skills
+2 to Druid Skill Levels
+2 to Sorceress Skill Levels
+(131 to 170)% Enhanced Defense
+50 to all Attributes
+40 Life Regenerated per Second
Socketed (6)
NIGHTMARE (CLVL 55-104)
ATTRIBUTE POINTS
Additional 40 points into STR (80 Base STR) → everything else into DEX.
SKILL POINTS
Distribute points as you were until clvl 90. From then on, focus exclusively on maxing Baneblade. Ignore Symbol of Esu and Premonition for now.
GEARING
Uptier your weapon and shield to T4 as soon as you have the ACs, DEX, and meet the clvl reqs.
If you don’t find
Herald of Skartara
or Herald of Skartara
Reflex Bow (4)
Two-Hand Damage: (23 - 29) to (37 - 48)
(Amazon Only)
Required Level: 11
Required Dexterity: 103
Item Level: 29
Dexterity Damage Bonus: (0.15 per Dexterity)%
1% Chance to cast level 3 Phalanx on Kill
1% Chance to cast level 6 Celerity on Kill
15% Attack Speed
Adds (11 to 15)-(21 to 30) Damage
+(35 to 57)% Enhanced Damage
10% Magic Find
Socketed (2)
Two-Hand Damage: (63 - 77) to (93 - 108)
(Amazon Only)
Required Level: 30
Required Dexterity: 150
Item Level: 40
Dexterity Damage Bonus: (0.15 per Dexterity)%
2% Chance to cast level 7 Phalanx on Kill
2% Chance to cast level 10 Celerity on Kill
25% Attack Speed
Adds (25 to 35)-(41 to 50) Damage
+(81 to 103)% Enhanced Damage
20% Magic Find
Socketed (4)
Two-Hand Damage: (124 - 142) to (173 - 204)
(Amazon Only)
Required Level: 48
Required Dexterity: 290
Item Level: 67
Dexterity Damage Bonus: (0.15 per Dexterity)%
3% Chance to cast level 11 Phalanx on Kill
3% Chance to cast level 14 Celerity on Kill
35% Attack Speed
Adds (36 to 45)-(51 to 70) Damage
+(126 to 149)% Enhanced Damage
30% Magic Find
Socketed (5)
Two-Hand Damage: (168 - 187) to (230 - 263)
(Amazon Only)
Required Level: 57
Required Dexterity: 570
Item Level: 85
Dexterity Damage Bonus: (0.15 per Dexterity)%
4% Chance to cast level 13 Phalanx on Kill
4% Chance to cast level 20 Celerity on Kill
40% Attack Speed
Adds (51 to 60)-(71 to 90) Damage
+(149 to 171)% Enhanced Damage
40% Magic Find
Socketed (6)
The Black Dame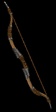
, make The Black Dame
Long War Bow (4)
Two-Hand Damage: 16 to (23 - 32)
Required Level: 11
Required Dexterity: 108
Item Level: 29
Dexterity Damage Bonus: (0.13 per Dexterity)%
1% Chance to cast level 1 Barrage on Kill
30% Attack Speed
+(1 to 10) to Maximum Damage
(11 to 15)% Mana stolen per Hit
+60% Enhanced Damage
+(5 to 8) to Tantrum
Slow Target (3 to 5)%
(21 to 25)% Bonus to Defense
+1% to Experience Gained
Requirements +10%
Socketed (2)
Two-Hand Damage: 46 to (75 - 94)
Required Level: 30
Required Dexterity: 178
Item Level: 40
Dexterity Damage Bonus: (0.13 per Dexterity)%
1% Chance to cast level 5 Barrage on Kill
45% Attack Speed
+(11 to 30) to Maximum Damage
(16 to 20)% Mana stolen per Hit
+100% Enhanced Damage
+(9 to 12) to Tantrum
Slow Target (9 to 11)%
(31 to 35)% Bonus to Defense
+2% to Experience Gained
Requirements +25%
Socketed (4)
Two-Hand Damage: 108 to (179 - 198)
Required Level: 48
Required Dexterity: 415
Item Level: 67
Dexterity Damage Bonus: (0.13 per Dexterity)%
1% Chance to cast level 10 Barrage on Kill
60% Attack Speed
+(31 to 50) to Maximum Damage
(21 to 25)% Mana stolen per Hit
+140% Enhanced Damage
+(13 to 16) to Tantrum
Slow Target (15 to 17)%
(41 to 45)% Bonus to Defense
+2% to Experience Gained
Requirements +50%
Socketed (5)
Two-Hand Damage: 151 to (277 - 307)
Required Level: 57
Required Dexterity: 950
Item Level: 85
Dexterity Damage Bonus: (0.13 per Dexterity)%
1% Chance to cast level 16 Barrage on Kill
75% Attack Speed
+(70 to 100) to Maximum Damage
(26 to 30)% Mana stolen per Hit
+180% Enhanced Damage
+(17 to 21) to Tantrum
Slow Target (18 to 20)%
(46 to 50)% Bonus to Defense
+3% to Experience Gained
Requirements +75%
Socketed (6)
Shockwave
for your merc once you have the Runes. Use a T3 Short or Long War Bow.Shockwave
Bows
'IthShael'
Runeword Level: 35
50% Chance to cast level 14 Punishers on Kill
+15% Bonus to Poison Skill Duration
+(11 to 15) to Maximum Damage
+(58 to 72)% Enhanced Damage
+10% to Poison Spell Damage
(3 to 5)% Chance of Crushing Blow
Slow Target (11 to 15)%
+(21 to 40) to Dexterity
+(21 to 40) to Energy
From here on, start collecting the following items as you find them:
- All Sacred Warp Blades, Ceremonial Armor, Sashes, and Spiked Shields.
Use Oils of Renewal to reroll them as you find them. Keep only the best versions of each, and replace them with better versions as they roll. Ideal rolls are:- Weapons = +60% ED
- Armor = +50% ED and +1% Phys Res
- 1x-4x Magic Sacred Warp Blade
- 1x Sacred or T4 Jared's Stone
- The MysteriesSetThe Mysteries
(Sorceress Melee Set)
Cauldron
Pentacle
Sacred Circle
Witchblade
Set Bonus with 2 or more set items:
+2 to Sorceress Skill Levels
+50 to Dexterity
Set Bonus with 3 or more set items:
+21 to Spiral Dance
Physical Resist 10%
Set Bonus with complete set:
+100 Damage
+4 to Ward of Fate
10% Chance of Crushing Blow
Weapon Physical Damage +100%
+4000 Defense
5% Chance to Avoid Damage
- PantheonSetPantheon
(Amazon Bow Set)
Earth
Fire
Frost
Water
Set Bonus with 2 or more set items:
50% Attack Speed
Elemental Resists +50%
Set Bonus with 3 or more set items:
Weapon Physical Damage +60%
+150 to Life
Set Bonus with complete set:
3% Chance to cast level 40 Trinity Nova on Kill
5% Chance to cast level 11 Time Strike on Striking
Adds 63-125 Damage
-45% to Enemy Elemental Resistances
Weapon Physical Damage +60%
+200 to Dexterity
- All Shrines
PROGRESSION NOTES
- A -30% Elemental Res penalty will be applied to you and your merc.
- All Act bosses will now heal 5% of their Max Life if they kill you.
- The side areas in all Acts are now filled with Veteran monsters. They’re tougher, but the XP gains and drops are better (supposedly).
► WALKTHROUGH
ACT 1
Have at least +40% Elemental Res. Add a few Sapphires to your weapon to help with Mana problems.
Be wary of Trap Rats. Their Quill Storm can hit-lock you.
ACT 2
Have at least +50% Elemental Res.
The Summoner in the Arcane Sanctuary will drop the Catalyst of Learning. Use this to turn spare Set pieces, Sacred Uniques (SUs), and Unique Rings, Amulets, and Jewels into Signets of Learning. SoL give you 1 free Attribute Point per Signet used (up to 400).
Use the Arcane Crystal from Jehryn to uptier your weapon to T4. Cube it with an Oil of Luck, then start adding MOs.
ACT 3
Have at least +60% Elemental Res.
Use the Arcane Crystal from Cain to uptier your shield to T4. Lucky and orb it.
After killing Mephisto, enter the rift to Kurast 3000 B.A. and complete the Ennead Challenge. Once you get your Class Charm, continue clearing K3KBA until you reach clvl 90 and find a
ACT 4
Boost your Fire and Poison Res to +75%. Socket your weapon with Skulls for more damage (Gems and Runes can push gear beyond their natural ED limits).
Izual will drop the Catalyst of Jewelcraft. You’ll use this to, you guessed it, craft Jewels.
ACT 5
Have +75% Elemental Res.
Nihlathak has a guaranteed Signet of Learning drop.
Baal’s minions are a lot more dangerous.
BAAL
There’s a huge difficulty spike here—like, by an order of magnitude. Bring extra Healing and Mana pots.
The fight mechanics are basically the same, but Baal’s Life, damage, and spell spam rate are all tuned way up. He’ll also constantly summon Minions of Destruction, which soak your Fusillades and keep you Slowed. As before, avoid black circles and Baal’s Mana-draining beam. Don’t bother to melee Baal directly. Just AG and lead him through Fusillades. Keep an eye on your merc and teleport to pull her back so she doesn’t get 1-shot by a black circle. When you need a break, teleport to the center peninsula, near the Worldstone.
PREPARING FOR HELL
Minimum requirements to move on:
Have at least +40% Elemental Res. Add a few Sapphires to your weapon to help with Mana problems.
Be wary of Trap Rats. Their Quill Storm can hit-lock you.
ACT 2
Have at least +50% Elemental Res.
The Summoner in the Arcane Sanctuary will drop the Catalyst of Learning. Use this to turn spare Set pieces, Sacred Uniques (SUs), and Unique Rings, Amulets, and Jewels into Signets of Learning. SoL give you 1 free Attribute Point per Signet used (up to 400).
Use the Arcane Crystal from Jehryn to uptier your weapon to T4. Cube it with an Oil of Luck, then start adding MOs.
ACT 3
Have at least +60% Elemental Res.
Use the Arcane Crystal from Cain to uptier your shield to T4. Lucky and orb it.
After killing Mephisto, enter the rift to Kurast 3000 B.A. and complete the Ennead Challenge. Once you get your Class Charm, continue clearing K3KBA until you reach clvl 90 and find a
Vizjerei Judgment
Vizjerei Dominion
(Sorceress Arcane Set)
.Vizjerei Judgment
Amulet
(Sorceress Only)
Required Level: 90
Item Level: 90
+1 to Sorceress Skill Levels
(20 to 30)% Cast Speed
+(800 to 1200) to Mana
Elemental Resists +(20 to 30)%
Amulet
(Sorceress Only)
Required Level: 90
Item Level: 90
+1 to Sorceress Skill Levels
(20 to 30)% Cast Speed
+(800 to 1200) to Mana
Elemental Resists +(20 to 30)%
Vizjerei Dominion
(Sorceress Arcane Set)
ACT 4
Boost your Fire and Poison Res to +75%. Socket your weapon with Skulls for more damage (Gems and Runes can push gear beyond their natural ED limits).
Izual will drop the Catalyst of Jewelcraft. You’ll use this to, you guessed it, craft Jewels.
ACT 5
Have +75% Elemental Res.
Nihlathak has a guaranteed Signet of Learning drop.
Baal’s minions are a lot more dangerous.
BAAL
There’s a huge difficulty spike here—like, by an order of magnitude. Bring extra Healing and Mana pots.
The fight mechanics are basically the same, but Baal’s Life, damage, and spell spam rate are all tuned way up. He’ll also constantly summon Minions of Destruction, which soak your Fusillades and keep you Slowed. As before, avoid black circles and Baal’s Mana-draining beam. Don’t bother to melee Baal directly. Just AG and lead him through Fusillades. Keep an eye on your merc and teleport to pull her back so she doesn’t get 1-shot by a black circle. When you need a break, teleport to the center peninsula, near the Worldstone.
PREPARING FOR HELL
Minimum requirements to move on:
- The Warped Blade[T4]The Warped Blade
Warp Blade (4)
One-Hand Damage: (8 - 10) to (25 - 39)
(Sorceress Only)
Required Level: 12
Required Dexterity: 39 to 41
Item Level: 10
Dexterity Damage Bonus: (0.13 per Dexterity)%
Area Effect Attack
5% Chance to cast level 12 Energy Beam on Melee Attack
15% Attack Speed
+(13 to 25) to Maximum Damage
+(24 to 46)% Enhanced Damage
+(16 to 25) to Dexterity
2% Reanimate as: Random Monster
Requirements -(11 to 15)%
Socketed (2)
One-Hand Damage: (25 - 28) to (78 - 96)
(Sorceress Only)
Required Level: 33
Required Dexterity: 53 to 56
Item Level: 31
Dexterity Damage Bonus: (0.13 per Dexterity)%
Area Effect Attack
10% Chance to cast level 20 Energy Beam on Melee Attack
25% Attack Speed
+(38 to 50) to Maximum Damage
+(69 to 92)% Enhanced Damage
+(36 to 45) to Dexterity
4% Reanimate as: Random Monster
Requirements -(21 to 25)%
Socketed (4)
One-Hand Damage: (49 - 54) to (157 - 179)
(Sorceress Only)
Required Level: 52
Required Dexterity: 91 to 96
Item Level: 51
Dexterity Damage Bonus: (0.13 per Dexterity)%
Area Effect Attack
15% Chance to cast level 28 Energy Beam on Melee Attack
35% Attack Speed
+(63 to 75) to Maximum Damage
+(115 to 137)% Enhanced Damage
+(56 to 65) to Dexterity
6% Reanimate as: Random Monster
Requirements -(31 to 35)%
Socketed (5)
One-Hand Damage: (69 - 75) to (202 - 225)
(Sorceress Only)
Required Level: 62
Required Dexterity: 166 to 177
Item Level: 77
Dexterity Damage Bonus: (0.13 per Dexterity)%
Area Effect Attack
20% Chance to cast level 36 Energy Beam on Melee Attack
40% Attack Speed
+(76 to 88) to Maximum Damage
+(138 to 160)% Enhanced Damage
+(66 to 75) to Dexterity
8% Reanimate as: Random Monster
Requirements -(36 to 40)%
Socketed (6) - Cloudladder[T4]Cloudladder
Spiked Shield (4)
Defense: (102 - 116) to (203 - 230)
Chance to Block: Class%
Required Level: 7
Required Dexterity: 55
Item Level: 10
+1 to All Skills
+1 to Druid Skill Levels
+1 to Sorceress Skill Levels
+(41 to 60)% Enhanced Defense
+20 to all Attributes
+10 Life Regenerated per Second
Socketed (1)
Defense: (372 - 414) to (629 - 699)
Chance to Block: Class%
Required Level: 24
Required Dexterity: 81
Item Level: 36
+(1 to 2) to All Skills
+(1 to 2) to Druid Skill Levels
+(1 to 2) to Sorceress Skill Levels
+(71 to 90)% Enhanced Defense
+30 to all Attributes
+20 Life Regenerated per Second
Socketed (4)
Defense: (920 - 1007) to (1503 - 1645)
Chance to Block: Class%
Required Level: 42
Required Dexterity: 170
Item Level: 51
+2 to All Skills
+2 to Druid Skill Levels
+2 to Sorceress Skill Levels
+(101 to 120)% Enhanced Defense
+40 to all Attributes
+30 Life Regenerated per Second
Socketed (5)
Defense: (1443 - 1687) to (2346 - 2743)
Chance to Block: Class%
Required Level: 51
Required Dexterity: 353
Item Level: 85
+2 to All Skills
+2 to Druid Skill Levels
+2 to Sorceress Skill Levels
+(131 to 170)% Enhanced Defense
+50 to all Attributes
+40 Life Regenerated per Second
Socketed (6) - Wedding Dress of the Zann[T4] – If you already have T2 or higher, uptier to T4.Wedding Dress of the Zann
Ceremonial Armor (4)
Defense: (352 - 409) to (706 - 821)
(Sorceress Only)
Required Level: 12
Required Dexterity: 97
Item Level: 29
15% Attack Speed
+(2 to 3) to Spiral Dance
4% Deadly Strike
+(35 to 57)% Enhanced Defense
+(16 to 25) to Strength
+(16 to 25) to Dexterity
Socketed (2)
Defense: (1131 - 1268) to (2161 - 2423)
(Sorceress Only)
Required Level: 31
Required Dexterity: 143
Item Level: 40
30% Attack Speed
+(4 to 5) to Spiral Dance
6% Deadly Strike
+(81 to 103)% Enhanced Defense
+(36 to 45) to Strength
+(36 to 45) to Dexterity
Socketed (4)
Defense: (2818 - 3105) to (5286 - 5824)
(Sorceress Only)
Required Level: 48
Required Dexterity: 300
Item Level: 67
45% Attack Speed
+(6 to 7) to Spiral Dance
8% Deadly Strike
+(126 to 149)% Enhanced Defense
+(56 to 65) to Strength
+(56 to 65) to Dexterity
Socketed (5)
Defense: (4203 - 4574) to (7888 - 8585)
(Sorceress Only)
Required Level: 55
Required Dexterity: 622
Item Level: 85
60% Attack Speed
+(7 to 8) to Spiral Dance
10% Deadly Strike
+(149 to 171)% Enhanced Defense
+(66 to 75) to Strength
+(66 to 75) to Dexterity
Socketed (6) - Haareis[T4] – If you already have T2 or higher, uptier to T4.Haareis
Diadem (4)
Defense: 36 to 80
Required Level: 10
Required Dexterity: 28
Item Level: 1
1% Chance to cast level 1 Shackles of Ice on Melee Attack
Adds 5-7 Cold Damage
(2 to 4)% Life stolen per Hit
(4 to 6)% to Strength
(4 to 6)% to Dexterity
(4 to 6)% to Vitality
Cold Resist +(16 to 25)%
Socketed (2)
Defense: 103 to 194
Required Level: 28
Required Dexterity: 57
Item Level: 31
2% Chance to cast level 5 Shackles of Ice on Melee Attack
Adds 18-20 Cold Damage
(8 to 10)% Life stolen per Hit
(7 to 9)% to Strength
(7 to 9)% to Dexterity
(7 to 9)% to Vitality
Cold Resist +(36 to 45)%
Socketed (2)
Defense: 215 to 386
Required Level: 46
Required Dexterity: 137
Item Level: 51
3% Chance to cast level 9 Shackles of Ice on Melee Attack
Adds 55-65 Cold Damage
(14 to 16)% Life stolen per Hit
(10 to 12)% to Strength
(10 to 12)% to Dexterity
(10 to 12)% to Vitality
Cold Resist +(56 to 65)%
Socketed (3)
Defense: 296 to 523
Required Level: 54
Required Dexterity: 294
Item Level: 77
4% Chance to cast level 11 Shackles of Ice on Melee Attack
Adds 175-190 Cold Damage
(17 to 19)% Life stolen per Hit
(13 to 15)% to Strength
(13 to 15)% to Dexterity
(13 to 15)% to Vitality
Cold Resist +(66 to 75)%
Socketed (4) - Lucky and max out MOs on all T4 gear, as your clvl allows.
HELL (CLVL 104+)
ATTRIBUTE POINTS
Put another 40 points into STR (120 Base STR) → everything else into to DEX.
SKILL POINTS
Max Baneblade → max Melee+Coven skills → 5 points Symbol of Esu → hold 1 point → everything else into Tenacity
GEARING
Equip whatever missing TUs you find when you find them. Make whatever you don’t find whenever you have the ACs. Upgrade your merc’s equipment with any decent gear you find.
AREA LEVELS
All Area Levels (alvls) in Hell are 100+, meaning item drops will be Item Level (ilvl) 99+. When looking for gear and/or Jewels for crafting, use Hell drops for the best possible rolls.
SACRED UNIQUES
There are 3 "tiers" (SU, SSU, and SSSU). Tiers only indicate how rare an SU is, not how good it may be. The places in which they can drop depend on alvl:
- SU = alvl 105+
- SU+SSU = alvl 120+
- SU+SSU+SSSU = alvl 130+
RANDOM WORLD DROPS
Useful items unique to Hell.
- Oils of Augmentation, Conjuration, Intensity, and Greater Luck
Special oils that do various things, but you’ll only care about Greater Luck. - Whispers of the Damned
Tiny skulls needed to access the Legion of the Damned quest. - Enchanted Runes
Powerful versions of regular Runes. Collect them all.
DUNGEONS AND RIFTS
- All Dungeons and Rifts have a minimum clvl requirement.
- Many Dungeons have lockout timers, and most timers are very short (often only 20 seconds). Be prepared before entering.
- Some bosses have a chance to drop a Trophy Fragment (usually 6%). Cubing 3 Fragments together will create a Trophy, which will add bonuses to its corresponding Charm. You can also create Fragments by cubing 20x of the same Charm. Farm for a perfect version of a Charm before cubing it with its Trophy (unless otherwise noted).
- Some Charms can be used in a Lottery recipe. This may add a bonus to a specific item type, depending on the Charm used. A Lottery bonus has a 3% chance of success, and the attempt will consume the Charm. Items cannot be Lotteried and Luckied.
PROGRESSION NOTES
- A -70% Elemental Res penalty will be applied to you and your merc.
- All Act bosses now regain 10% of their Max Life if they kill you.
- Activate all Waypoints.
- Journey through Hell only up to the Worldstone Keep Waypoint.
► WALKTHROUGH
ACT 1
Have at least +60% Elemental Res before leaving the Rogue Encampment. Max your merc’s Elemental Res.
Horror Under Tristram
Infernal Machine – unlocks Tenacity
ACT 2
Island of the Sunless Sea – Grind Island of the Sunless Sea until you’re clvl 110 and get the Sunless Crystal Bird.
Invasion I
The Binding of Baal
ACT 3
The first tier of Sacred Uniques have a chance to start dropping in regular areas from here on.
Torajan Jungles – Activate the Torajan Jungles Waypoint.
Inquisitor of the Triune
Akarat
Lord Aldric Jitan – Use Jitan’s Gate as your teleport skill from now on.
Death Projector
Horizon's Sanctum – Activate the Caldeum Waypoint.
ACT 4
In the Chaos Sanctuary, pick up the Key of Sin from Ghom and the Key of Lies from Magdha.
ACT 5
Assault on Mount Arreat
PREPARING FOR MID GAME
Minimum requirements to move on:
- Clvl 115 (grind the Torajan Jungles for XP).
- All gear at T4 and fully orbed, as your clvl allows.
- All Charms from the quests listed above.

GEAR
► expand
GEAR
Weapon: Sacred Honorific Warp Blade (Intimidating Bless) →
Armor:
Shield:
Helm:
Belt:
Gloves:
Boots:
Amulet:
Rings:
On Switch (optional):
SOCKET FILLERS*
Weapon (RW): Crafted Jewels with +15% AS
Weapon (S. Honorific): Skulls
Weapon (Set): Jah Runes
Armor (RW Belt): Crafted Jewel with +15% HR
Armor (Set Body Armor, Helm): Amethysts
Armor (Set Shield): Crafted Jewels (for BPs), Res Gems (as needed), Turquoises (MF for farming) → Fal Runes
Sorc Orb: Any Jewels with CS
MYSTIC ORBS
Weapon (RW): 5x ED on the base → Max Damage → DS
Weapon (S. Honorific): ED → Max Damage → DS → EWD → AS (as needed)
Weapon (Set): ED to cap (only if ED is below 190% after Luck Trial) → DS → Max Damage
Armor (Set): DEX → Max Damage
Armor (RW Belt): 5x ED on the base → HR
Armor (TU Gloves, Boots): HR → DEX → Max Damage → Life Regen
Armor (TU Shield): ED to cap → DEX → Max Damage → Life Regen
Jewelry: Poison Length Reduction → flat Life → Mana Regen → MF
Sorc Orb: CS (if needed)
*Use a Max Damage Catalyst for Crafted Jewels.
Weapon: Sacred Honorific Warp Blade (Intimidating Bless) →
Witchblade
The Mysteries
(Sorceress Melee Set)
Witchblade
Warp Blade (Sacred)
One-Hand Damage: (183 - 197) to (333 - 358)
(Sorceress Only)
Required Level: 100
Required Dexterity: 400
Item Level: 1
Dexterity Damage Bonus: (0.13 per Dexterity)%
Area Effect Attack
1% Chance to cast level 25 Sanguine Covenant on Melee Attack
Adds 50-100 Damage
Stun Attack
+(172 to 200)% Enhanced Damage
+100 Life Regenerated per Second
+(51 to 100) Life on Melee Attack
Socketed (6)
The Mysteries
(Sorceress Melee Set)
Armor:
Pentacle
The Mysteries
(Sorceress Melee Set)
Pentacle
Gambeson (Sacred)
Defense: (6091 - 6852) to (6492 - 7303)
(Sorceress Only)
Required Level: 100
Required Dexterity: 486
Item Level: 1
+3 to Sorceress Skill Levels
Adds 25-50 Damage
5% Chance of Crushing Blow
+(140 to 170)% Enhanced Defense
+(31 to 50) to all Attributes
Physical Resist 10%
(21 to 25)% Bonus to Defense
Socketed (6)
The Mysteries
(Sorceress Melee Set)
Shield:
Cauldron
The Mysteries
(Sorceress Melee Set)
Cauldron
Large Shield (Sacred)
Defense: (3474 - 4342) to (3904 - 4880)
Chance to Block: 1% + Class%
Required Level: 100
Required Strength: 420
Required Dexterity: 423
Item Level: 1
+150% Bonus to Miasma Haunt Duration
10% Chance to cast level 25 Spike Nova when Attacked
+1 to Sorceress Skill Levels
1% Base Block Chance
35% Block Speed
+(100 to 150)% Enhanced Defense
Requirements -20%
Socketed (4)
The Mysteries
(Sorceress Melee Set)
Helm:
Sacred Circle
The Mysteries
(Sorceress Melee Set)
Sacred Circle
Coronet (Sacred)
Defense: (1452 - 1633) to (1641 - 1846)
Required Level: 100
Required Dexterity: 327
Item Level: 1
+2 to Sorceress Skill Levels
25% Block Speed
25% Hit Recovery
+(140 to 170)% Enhanced Defense
+(31 to 50) to all Attributes
Maximum Life +2%
Maximum Mana +(11 to 15)%
Elemental Resists +(31 to 40)%
Socketed (4)
The Mysteries
(Sorceress Melee Set)
Belt:
Truce
Truce
Belts
'Jah'
Runeword Level: 80
5% Combat Speeds
Stun Attack
Slows Attacker by 5%
+(172 to 200)% Enhanced Defense
Physical Resist 10%
Belts
'Jah'
Runeword Level: 80
5% Combat Speeds
Stun Attack
Slows Attacker by 5%
+(172 to 200)% Enhanced Defense
Physical Resist 10%
Gloves:
Water
Pantheon
(Amazon Bow Set)
Water
Leather Gloves (Sacred)
Defense: (940 - 1175) to (954 - 1192)
Required Level: 80
Required Strength: 335
Item Level: 1
+(100 to 150)% Enhanced Defense
(11 to 15)% to Strength
(11 to 15)% to Dexterity
Fire Resist +(31 to 50)%
(13 to 19)% Gold Find
Requirements -33%
Socketed (4)
Leather Gloves (Sacred)
Defense: (940 - 1175) to (954 - 1192)
Required Level: 80
Required Strength: 335
Item Level: 1
+(100 to 150)% Enhanced Defense
(11 to 15)% to Strength
(11 to 15)% to Dexterity
Fire Resist +(31 to 50)%
(13 to 19)% Gold Find
Requirements -33%
Socketed (4)
Pantheon
(Amazon Bow Set)
Boots:
Frost
Pantheon
(Amazon Bow Set)
Frost
Boots (Sacred)
Defense: (1302 - 1627) to (1342 - 1677)
Required Level: 80
Required Strength: 335
Item Level: 1
(10 to 40)% Movement Speed
30% Hit Recovery
+(100 to 150)% Enhanced Defense
(11 to 15)% to Strength
(11 to 15)% to Dexterity
Cold Resist +(31 to 50)%
(11 to 13)% Magic Find
Requirements -33%
Socketed (4)
Pantheon
(Amazon Bow Set)
Amulet:
Athulua's Oracle
Athulua's Oracle
Amulet
Required Level: 60
Item Level: 60
+(1 to 2) to All Skills
40% Attack Speed
(150 to 250)% Bonus to Attack Rating
Cannot Be Frozen
Amulet
Required Level: 60
Item Level: 60
+(1 to 2) to All Skills
40% Attack Speed
(150 to 250)% Bonus to Attack Rating
Cannot Be Frozen
Rings:
Ripstar
Ripstar
Ring
Required Level: 60
Item Level: 60
+0.5625 to Maximum Damage (Based on Character Level)
+20 Life on Melee Attack
Ring
Required Level: 60
Item Level: 60
+0.5625 to Maximum Damage (Based on Character Level)
+20 Life on Melee Attack
On Switch (optional):
Kabbalah
in a T4 or Sacred Jared’s Stone (Divine Apparition oskill). Pair with Kabbalah
Sorceress Orbs
'Cham'
Runeword Level: 83
+3 to Sorceress Skill Levels
-1% Base Block Chance
60% Hit Recovery
+(6 to 16) to Divine Apparition
20% to Energy
Maximum Life and Mana +5%
+(100 to 200) Life when Struck by an Enemy
Sorceress Orbs
'Cham'
Runeword Level: 83
+3 to Sorceress Skill Levels
-1% Base Block Chance
60% Hit Recovery
+(6 to 16) to Divine Apparition
20% to Energy
Maximum Life and Mana +5%
+(100 to 200) Life when Struck by an Enemy
Cloudladder
.Cloudladder
Spiked Shield (4)
Defense: (102 - 116) to (203 - 230)
Chance to Block: Class%
Required Level: 7
Required Dexterity: 55
Item Level: 10
+1 to All Skills
+1 to Druid Skill Levels
+1 to Sorceress Skill Levels
+(41 to 60)% Enhanced Defense
+20 to all Attributes
+10 Life Regenerated per Second
Socketed (1)
Defense: (372 - 414) to (629 - 699)
Chance to Block: Class%
Required Level: 24
Required Dexterity: 81
Item Level: 36
+(1 to 2) to All Skills
+(1 to 2) to Druid Skill Levels
+(1 to 2) to Sorceress Skill Levels
+(71 to 90)% Enhanced Defense
+30 to all Attributes
+20 Life Regenerated per Second
Socketed (4)
Defense: (920 - 1007) to (1503 - 1645)
Chance to Block: Class%
Required Level: 42
Required Dexterity: 170
Item Level: 51
+2 to All Skills
+2 to Druid Skill Levels
+2 to Sorceress Skill Levels
+(101 to 120)% Enhanced Defense
+40 to all Attributes
+30 Life Regenerated per Second
Socketed (5)
Defense: (1443 - 1687) to (2346 - 2743)
Chance to Block: Class%
Required Level: 51
Required Dexterity: 353
Item Level: 85
+2 to All Skills
+2 to Druid Skill Levels
+2 to Sorceress Skill Levels
+(131 to 170)% Enhanced Defense
+50 to all Attributes
+40 Life Regenerated per Second
Socketed (6)
SOCKET FILLERS*
Weapon (RW): Crafted Jewels with +15% AS
Weapon (S. Honorific): Skulls
Weapon (Set): Jah Runes
Armor (RW Belt): Crafted Jewel with +15% HR
Armor (Set Body Armor, Helm): Amethysts
Armor (Set Shield): Crafted Jewels (for BPs), Res Gems (as needed), Turquoises (MF for farming) → Fal Runes
Sorc Orb: Any Jewels with CS
MYSTIC ORBS
Weapon (RW): 5x ED on the base → Max Damage → DS
Weapon (S. Honorific): ED → Max Damage → DS → EWD → AS (as needed)
Weapon (Set): ED to cap (only if ED is below 190% after Luck Trial) → DS → Max Damage
Armor (Set): DEX → Max Damage
Armor (RW Belt): 5x ED on the base → HR
Armor (TU Gloves, Boots): HR → DEX → Max Damage → Life Regen
Armor (TU Shield): ED to cap → DEX → Max Damage → Life Regen
Jewelry: Poison Length Reduction → flat Life → Mana Regen → MF
Sorc Orb: CS (if needed)
*Use a Max Damage Catalyst for Crafted Jewels.
ATTRIBUTE POINTS
As long as you have 120 Base STR, everything can go to DEX. Any additional STR you may need will come from Charms.
SKILL POINTS
1 point Force Blast → max Tenacity → max Endurance
GEARING
Keep collecting and rerolling Sacred bases for End Game RWs.
PROGRESSION NOTES
- From here on, the guide will be divided into quest groupings based on your clvl. Some “DPS check” quests are pushed back because you won’t have high enough DPS to complete them otherwise.
- Your merc will die a lot.
► WALKTHROUGH
CLVL 115
The Black Road – unlocks Force Blast
Rathma Square
Legacy Of Blood – unlocks Endurance
Kurast 3000 B.A.
Library of Fate – Activate the Silver City Waypoint.
The Veiled Prophet
Bull Prince Rodeo
Tran Athulua – Activate both the Tran Athulua Waypoint and the Island of Skartara Waypoint.
Heart of Sin
Invasion II – If you can’t get the upgrade now, come back when you have the Set.
THE CLVL 115-120 GRIND
You’ll mostly be grinding Kurast and Tran Athulua. While there, keep an eye out for the following:
You can upgrade your Weapon at any time. Just make sure you’re still hitting your BPs. If using RWs, don’t forget to orb your Sacred base items with ED and lucky your Crafted Jewels before making the RW.
Minimum requirements to move on:
CLVL 120
Athulua
Judgment Day – If you can’t get the upgrade now, come back when you have the Set.
Kabraxis
Duncraig – Activate the Duncraig Waypoint.
Quov Tsin
Kingdom of Shadow
The Triune
Toraja
Teganze
THE CLVL 120-125 GRIND
You’ll hit one of Median’s infamous gear walls here—the point at which many non-meta builds can’t progress without specific gear. For you, that gear is
This time, you’ll have 6 areas to choose from:
Minimum requirements to move on:
Recommended extras:
The Black Road – unlocks Force Blast
Rathma Square
Legacy Of Blood – unlocks Endurance
Kurast 3000 B.A.
Library of Fate – Activate the Silver City Waypoint.
The Veiled Prophet
Bull Prince Rodeo
Tran Athulua – Activate both the Tran Athulua Waypoint and the Island of Skartara Waypoint.
Heart of Sin
Invasion II – If you can’t get the upgrade now, come back when you have the Set.
THE CLVL 115-120 GRIND
You’ll mostly be grinding Kurast and Tran Athulua. While there, keep an eye out for the following:
- K3KBA = The Mysteries,The Mysteries
(Sorceress Melee Set)
Cauldron
Pentacle
Sacred Circle
Witchblade
Set Bonus with 2 or more set items:
+2 to Sorceress Skill Levels
+50 to Dexterity
Set Bonus with 3 or more set items:
+21 to Spiral Dance
Physical Resist 10%
Set Bonus with complete set:
+100 Damage
+4 to Ward of Fate
10% Chance of Crushing Blow
Weapon Physical Damage +100%
+4000 Defense
5% Chance to Avoid Damage
Pantheon, andPantheon
(Amazon Bow Set)
Earth
Fire
Frost
Water
Set Bonus with 2 or more set items:
50% Attack Speed
Elemental Resists +50%
Set Bonus with 3 or more set items:
Weapon Physical Damage +60%
+150 to Life
Set Bonus with complete set:
3% Chance to cast level 40 Trinity Nova on Kill
5% Chance to cast level 11 Time Strike on Striking
Adds 63-125 Damage
-45% to Enemy Elemental Resistances
Weapon Physical Damage +60%
+200 to Dexterity
Witchhunter's HoodWitchhunter's Hood
Cap (Sacred)
Defense: (2136 - 2611) to (2161 - 2642)
Required Level: 90
Required Strength: 250
Item Level: 1
+(80 to 120)% Enhanced Defense
10% to Strength
10% to Dexterity
Maximum Elemental Resists +1%
Elemental Resists +(31 to 40)%
Physical Resist 5%
(16 to 20)% Bonus to Defense
Requirements -50%
Socketed (4)
Witchhunter's Attire
(Assassin Claw Set) - TA = ACs, Sunstones, Trophy Fragments, and an Askari Call
You can upgrade your Weapon at any time. Just make sure you’re still hitting your BPs. If using RWs, don’t forget to orb your Sacred base items with ED and lucky your Crafted Jewels before making the RW.
Minimum requirements to move on:
- Sacred Honorific Warp Blade with successful ED roll, or Shaula.


 Shaula
Sorceress Crystal Swords
'BerMalLum'
Runeword Level: 78
+(1 to 2) to Sorceress Skill Levels
40% Attack Speed
Adds (30 to 40)-(60 to 70) Damage
+(141 to 171)% Enhanced Damage
Slow Target (5 to 10)%
3% to All Attributes
+(3 to 5)% to Experience Gained - Truce(needed only for a couple quests. Otherwise, keep usingTruce
Belts
'Jah'
Runeword Level: 80
5% Combat Speeds
Stun Attack
Slows Attacker by 5%
+(172 to 200)% Enhanced Defense
Physical Resist 10%Wormtonguefor the DEX+LL)Wormtongue
Light Belt (4)
Defense: (53 - 58) to (71 - 78)
Required Level: 3
Required Strength: 26
Item Level: 1
(31 to 50)% Bonus to Attack Rating
Adds 5-13 Poison Damage over 2 seconds
(2 to 4)% Life stolen per Hit
+(18 to 29)% Enhanced Defense
+(11 to 15) to Dexterity
Socketed (1)
Defense: (214 - 231) to (259 - 279)
Required Level: 21
Required Strength: 55
Item Level: 31
(71 to 90)% Bonus to Attack Rating
Adds 19-50 Poison Damage over 2 seconds
(8 to 10)% Life stolen per Hit
+(41 to 52)% Enhanced Defense
+(21 to 25) to Dexterity
Socketed (2)
Defense: (544 - 581) to (649 - 693)
Required Level: 38
Required Strength: 192
Item Level: 51
(111 to 130)% Bonus to Attack Rating
Adds 75-150 Poison Damage over 2 seconds
(14 to 16)% Life stolen per Hit
+(64 to 75)% Enhanced Defense
+(31 to 35) to Dexterity
Socketed (2)
Defense: (801 - 851) to (946 - 1006)
Required Level: 46
Required Strength: 384
Item Level: 77
(131 to 150)% Bonus to Attack Rating
Adds 100-250 Poison Damage over 2 seconds
(17 to 19)% Life stolen per Hit
+(75 to 86)% Enhanced Defense
+(36 to 40) to Dexterity
Socketed (2) - Askari Call
- 129% AS
- 109% HR
- Maxed MOs on all gear, as your clvl allows.
CLVL 120
Athulua
Judgment Day – If you can’t get the upgrade now, come back when you have the Set.
Kabraxis
Duncraig – Activate the Duncraig Waypoint.
Quov Tsin
Kingdom of Shadow
The Triune
Toraja
Teganze
THE CLVL 120-125 GRIND
You’ll hit one of Median’s infamous gear walls here—the point at which many non-meta builds can’t progress without specific gear. For you, that gear is
The Mysteries
+The Mysteries
(Sorceress Melee Set)
Cauldron
Pentacle
Sacred Circle
Witchblade
Set Bonus with 2 or more set items:
+2 to Sorceress Skill Levels
+50 to Dexterity
Set Bonus with 3 or more set items:
+21 to Spiral Dance
Physical Resist 10%
Set Bonus with complete set:
+100 Damage
+4 to Ward of Fate
10% Chance of Crushing Blow
Weapon Physical Damage +100%
+4000 Defense
5% Chance to Avoid Damage
Water
Pantheon
(Amazon Bow Set)
+Water
Leather Gloves (Sacred)
Defense: (940 - 1175) to (954 - 1192)
Required Level: 80
Required Strength: 335
Item Level: 1
+(100 to 150)% Enhanced Defense
(11 to 15)% to Strength
(11 to 15)% to Dexterity
Fire Resist +(31 to 50)%
(13 to 19)% Gold Find
Requirements -33%
Socketed (4)
Leather Gloves (Sacred)
Defense: (940 - 1175) to (954 - 1192)
Required Level: 80
Required Strength: 335
Item Level: 1
+(100 to 150)% Enhanced Defense
(11 to 15)% to Strength
(11 to 15)% to Dexterity
Fire Resist +(31 to 50)%
(13 to 19)% Gold Find
Requirements -33%
Socketed (4)
Pantheon
(Amazon Bow Set)
Frost
Pantheon
(Amazon Bow Set)
.Frost
Boots (Sacred)
Defense: (1302 - 1627) to (1342 - 1677)
Required Level: 80
Required Strength: 335
Item Level: 1
(10 to 40)% Movement Speed
30% Hit Recovery
+(100 to 150)% Enhanced Defense
(11 to 15)% to Strength
(11 to 15)% to Dexterity
Cold Resist +(31 to 50)%
(11 to 13)% Magic Find
Requirements -33%
Socketed (4)
Pantheon
(Amazon Bow Set)
This time, you’ll have 6 areas to choose from:
- Duncraig = XP, SUs/SSUs
Bully Assur for a +2 Sorc Skills Demonsbane and Trophy fragments. - Triune = XP, Cycles
Any small or medium DEX, VIT, Combat Speeds, and MF Cycles can be added to your Charm. Hold any large DEX and large MF Cycles. - Teganze = XP, Essences, Runestones
- K3KBA = Sets, sometimes Sus
Aim for around 135% MF here. That seems to yield a good mix of Set pieces and Unique Jewelry. - Troajan Jungles = SoL
- Tran Athulua = ACs
Bully the Priestesses for better Sunstones and Trophy fragments.
Minimum requirements to move on:
- Clvl 125
- The MysteriesThe Mysteries
(Sorceress Melee Set)
Cauldron
Pentacle
Sacred Circle
Witchblade
Set Bonus with 2 or more set items:
+2 to Sorceress Skill Levels
+50 to Dexterity
Set Bonus with 3 or more set items:
+21 to Spiral Dance
Physical Resist 10%
Set Bonus with complete set:
+100 Damage
+4 to Ward of Fate
10% Chance of Crushing Blow
Weapon Physical Damage +100%
+4000 Defense
5% Chance to Avoid Damage
- WaterWater
Leather Gloves (Sacred)
Defense: (940 - 1175) to (954 - 1192)
Required Level: 80
Required Strength: 335
Item Level: 1
+(100 to 150)% Enhanced Defense
(11 to 15)% to Strength
(11 to 15)% to Dexterity
Fire Resist +(31 to 50)%
(13 to 19)% Gold Find
Requirements -33%
Socketed (4)
Pantheon
(Amazon Bow Set) - FrostFrost
Boots (Sacred)
Defense: (1302 - 1627) to (1342 - 1677)
Required Level: 80
Required Strength: 335
Item Level: 1
(10 to 40)% Movement Speed
30% Hit Recovery
+(100 to 150)% Enhanced Defense
(11 to 15)% to Strength
(11 to 15)% to Dexterity
Cold Resist +(31 to 50)%
(11 to 13)% Magic Find
Requirements -33%
Socketed (4)
Pantheon
(Amazon Bow Set) - TruceTruce
Belts
'Jah'
Runeword Level: 80
5% Combat Speeds
Stun Attack
Slows Attacker by 5%
+(172 to 200)% Enhanced Defense
Physical Resist 10% - Athulua's OracleAthulua's Oracle
Amulet
Required Level: 60
Item Level: 60
+(1 to 2) to All Skills
40% Attack Speed
(150 to 250)% Bonus to Attack Rating
Cannot Be Frozen - Ripstar(x1)Ripstar
Ring
Required Level: 60
Item Level: 60
+0.5625 to Maximum Damage (Based on Character Level)
+20 Life on Melee Attack - 129% AS
- 109% HR
- 200 SoL into DEX
- J-Day upgrade
Recommended extras:
- Soul of Kabraxiswith at least +2 Max Res
 Soul of Kabraxis
Required Level: 120
Keep in Inventory to Gain Bonus
+1 to All Skills
Maximum Fire Resist +(2 to 3)%
Maximum Lightning Resist +(2 to 3)%
Maximum Cold Resist +(2 to 3)%
Maximum Poison Resist +(2 to 3)% - Invasion II upgrade

GEAR
► LATE GAME BASE KIT
BASE KIT
GEAR
Weapon (Elemental):
Weapon (Physical):
Body Armor:
Shield:
Helm:
Belt:
Gloves:
Boots:
Amulet:
Rings: 2x
On Switch:
SOCKET FILLERS*
Weapon: Jah Runes
Sorc Orb: Any Jewels with CS
Armor: Amethysts, Res Gems, or Crafted Jewels with AS/HR/BS
Shield: Fal Runes or Turquoises
MYSTIC ORBS
Weapon (Starhawk): IED
Weapon (Steel Punisher): DS
Armor (SU): HR → DEX → Max Damage
Armor (TU): DEX → Max Damage → Life Regen → MF → HR
Jewelry: PLR → flat Life → Mana Regen → MF
Orb: FCR
*Use a Max Damage Catalyst for Crafted Jewels.
GEAR
Weapon (Elemental):
Starhawk
Starhawk
Warp Blade (Sacred)
One-Hand Damage: 49 to 86
(Sorceress Only)
Required Level: 100
Required Dexterity: 400
Item Level: 105
Dexterity Damage Bonus: (0.13 per Dexterity)%
Innate Tri-Elemental Damage: (45.0% of Dexterity)
Area Effect Attack
25% Chance to cast level 50 Magic Missiles on Melee Attack
+(3 to 5) to Sorceress Skill Levels
50% Attack Speed
Adds 400-500 Magic Damage
-(25 to 35)% to Enemy Elemental Resistances
10% Chance to Avoid Damage
Socketed (6)
Weapon (Physical):
Steel Punisher
Steel Punisher
Warp Blade (Sacred)
One-Hand Damage: (172 - 187) to (332 - 358)
(Sorceress Only)
Required Level: 100
Required Dexterity: 400
Item Level: 120
Dexterity Damage Bonus: (0.13 per Dexterity)%
Area Effect Attack
Spiral Dance: +300% Bonus Magic Damage
15% Chance to cast level 25 ATMG Sentry on Melee Attack
+(1 to 2) to Sorceress Skill Levels
Adds 40-100 Damage
(15 to 20)% Life stolen per Hit
+(170 to 200)% Enhanced Damage
10% Deadly Strike
Physical Resist 10%
Socketed (6)
Body Armor:
Pentacle
The Mysteries
(Sorceress Melee Set)
Pentacle
Gambeson (Sacred)
Defense: (6091 - 6852) to (6492 - 7303)
(Sorceress Only)
Required Level: 100
Required Dexterity: 486
Item Level: 1
+3 to Sorceress Skill Levels
Adds 25-50 Damage
5% Chance of Crushing Blow
+(140 to 170)% Enhanced Defense
+(31 to 50) to all Attributes
Physical Resist 10%
(21 to 25)% Bonus to Defense
Socketed (6)
The Mysteries
(Sorceress Melee Set)
Shield:
Wheel of Fortune
Wheel of Fortune
Large Shield (4)
Defense: 85 to 162
Chance to Block: Class%
Required Level: 4
Required Strength: 27
Required Dexterity: 45
Item Level: 10
+(21 to 30) to Vitality
Maximum Elemental Resists +1%
Elemental Resists +(6 to 10)%
Fire Absorb 1%
Lightning Absorb 1%
Cold Absorb 1%
(4 to 7)% Gold Find
(5 to 10)% Magic Find
Socketed (1)
Defense: 240 to 405
Chance to Block: Class%
Required Level: 21
Required Strength: 53
Required Dexterity: 67
Item Level: 31
+(31 to 40) to Vitality
Maximum Elemental Resists +1%
Elemental Resists +(11 to 20)%
Fire Absorb 2%
Lightning Absorb 2%
Cold Absorb 2%
(9 to 12)% Gold Find
(11 to 20)% Magic Find
Socketed (3)
Defense: 501 to 817
Chance to Block: Class%
Required Level: 39
Required Strength: 184
Required Dexterity: 139
Item Level: 51
+(41 to 50) to Vitality
Maximum Elemental Resists +2%
Elemental Resists +(21 to 30)%
Fire Absorb 2%
Lightning Absorb 2%
Cold Absorb 2%
(14 to 17)% Gold Find
(21 to 30)% Magic Find
Socketed (4)
Defense: 684 to 1113
Chance to Block: Class%
Required Level: 48
Required Strength: 368
Required Dexterity: 288
Item Level: 77
+(51 to 60) to Vitality
Maximum Elemental Resists +2%
Elemental Resists +(31 to 40)%
Fire Absorb 3%
Lightning Absorb 3%
Cold Absorb 3%
(17 to 19)% Gold Find
(31 to 40)% Magic Find
Socketed (4)
Helm:
Royal Circlet
Royal Circlet
Tiara (Sacred)
Defense: (1740 - 1957) to (1968 - 2214)
Required Level: 100
Required Dexterity: 392
Item Level: 105
+2 to All Skills
+50% Damage to Demons
+50% Damage to Undead
+(140 to 170)% Enhanced Defense
(21 to 25)% to All Attributes
Elemental Resists +(25 to 30)%
Physical Resist 5%
(21 to 25)% Magic Find
Socketed (4)
Belt:
The Endless Loop
The Endless Loop
Light Belt (Sacred)
Defense: 1101 to 1143
Required Level: 100
Required Strength: 550
Item Level: 105
40% Combat Speeds
+(10 to 19) to Charged Strike
Slow Target 10%
+50 to all Attributes
+75 Life Regenerated per Second
+(0 to 1) Mana on Striking
Socketed (2)
Light Belt (Sacred)
Defense: 1101 to 1143
Required Level: 100
Required Strength: 550
Item Level: 105
40% Combat Speeds
+(10 to 19) to Charged Strike
Slow Target 10%
+50 to all Attributes
+75 Life Regenerated per Second
+(0 to 1) Mana on Striking
Socketed (2)
Gloves:
Hammerfist
Hammerfist
Gauntlets (Sacred)
Defense: (1227 - 1450) to (1436 - 1697)
Required Level: 100
Required Strength: 625
Item Level: 105
Adds (1 to 15)-(20 to 30) Damage
5% Life stolen per Hit
+(15 to 25) to Spiral Dance
5% Chance of Crushing Blow
Weapon Physical Damage +(30 to 60)%
+(120 to 160)% Enhanced Defense
Elemental Resists +15%
Socketed (4)
Boots:
Zealot Rush
Zealot Rush
Light Plated Boots (4)
Defense: (67 - 78) to (102 - 119)
Required Level: 6
Required Strength: 31
Item Level: 10
5% Attack Speed
(10 to 40)% Movement Speed
(11 to 25)% Bonus to Attack Rating
+(21 to 40)% Enhanced Defense
(3 to 5)% to Dexterity
1% Reanimate as: Random Monster
Socketed (1)
Defense: (248 - 281) to (338 - 384)
Required Level: 24
Required Strength: 62
Item Level: 36
10% Attack Speed
(10 to 40)% Movement Speed
(41 to 55)% Bonus to Attack Rating
+(41 to 60)% Enhanced Defense
(9 to 11)% to Dexterity
2% Reanimate as: Random Monster
Socketed (2)
Defense: (613 - 685) to (817 - 914)
Required Level: 41
Required Strength: 218
Item Level: 51
20% Attack Speed
(10 to 40)% Movement Speed
(71 to 85)% Bonus to Attack Rating
+(61 to 80)% Enhanced Defense
(15 to 17)% to Dexterity
3% Reanimate as: Random Monster
Socketed (3)
Defense: (944 - 1044) to (1247 - 1378)
Required Level: 50
Required Strength: 436
Item Level: 85
30% Attack Speed
(10 to 40)% Movement Speed
(86 to 100)% Bonus to Attack Rating
+(81 to 100)% Enhanced Defense
(18 to 20)% to Dexterity
4% Reanimate as: Random Monster
Socketed (4)
Amulet:
Athulua's Oracle
(if you need Cannot be Frozen) → Athulua's Oracle
Amulet
Required Level: 60
Item Level: 60
+(1 to 2) to All Skills
40% Attack Speed
(150 to 250)% Bonus to Attack Rating
Cannot Be Frozen
Amulet
Required Level: 60
Item Level: 60
+(1 to 2) to All Skills
40% Attack Speed
(150 to 250)% Bonus to Attack Rating
Cannot Be Frozen
Klaatu Barada Nikto
Klaatu Barada Nikto
Amulet
Required Level: 110
Item Level: 105
30% Enhanced Damage vs. Necrobots
10% Chance to cast level 40 Nova Bomb on Melee Attack
+2 to All Skills
25% Attack Speed
Adds 1-188 Lightning Damage
+650 Poison Damage over 2 seconds
Stun Attack
+(11 to 16) to Hive
Lightning Resist +(40 to 50)%
Poison Resist +(40 to 50)%
Rings: 2x
Ripstar
Ripstar
Ring
Required Level: 60
Item Level: 60
+0.5625 to Maximum Damage (Based on Character Level)
+20 Life on Melee Attack
Ring
Required Level: 60
Item Level: 60
+0.5625 to Maximum Damage (Based on Character Level)
+20 Life on Melee Attack
On Switch:
Circe

+Circe
Sorceress Orbs
'RhalArc'
Runeword Level: 100
+3 to All Skills when using an Apple
+3% Bonus to Spell Focus
+44% to Lightning Spell Damage
+44% to Poison Spell Damage
+24 to Bloodlust
(61 to 75)% to Energy
Fire Resist +40%
Sorceress Orbs
'RhalArc'
Runeword Level: 100
+3 to All Skills when using an Apple
+3% Bonus to Spell Focus
+44% to Lightning Spell Damage
+44% to Poison Spell Damage
+24 to Bloodlust
(61 to 75)% to Energy
Fire Resist +40%
Cloudladder
Cloudladder
Spiked Shield (4)
Defense: (102 - 116) to (203 - 230)
Chance to Block: Class%
Required Level: 7
Required Dexterity: 55
Item Level: 10
+1 to All Skills
+1 to Druid Skill Levels
+1 to Sorceress Skill Levels
+(41 to 60)% Enhanced Defense
+20 to all Attributes
+10 Life Regenerated per Second
Socketed (1)
Defense: (372 - 414) to (629 - 699)
Chance to Block: Class%
Required Level: 24
Required Dexterity: 81
Item Level: 36
+(1 to 2) to All Skills
+(1 to 2) to Druid Skill Levels
+(1 to 2) to Sorceress Skill Levels
+(71 to 90)% Enhanced Defense
+30 to all Attributes
+20 Life Regenerated per Second
Socketed (4)
Defense: (920 - 1007) to (1503 - 1645)
Chance to Block: Class%
Required Level: 42
Required Dexterity: 170
Item Level: 51
+2 to All Skills
+2 to Druid Skill Levels
+2 to Sorceress Skill Levels
+(101 to 120)% Enhanced Defense
+40 to all Attributes
+30 Life Regenerated per Second
Socketed (5)
Defense: (1443 - 1687) to (2346 - 2743)
Chance to Block: Class%
Required Level: 51
Required Dexterity: 353
Item Level: 85
+2 to All Skills
+2 to Druid Skill Levels
+2 to Sorceress Skill Levels
+(131 to 170)% Enhanced Defense
+50 to all Attributes
+40 Life Regenerated per Second
Socketed (6)
SOCKET FILLERS*
Weapon: Jah Runes
Sorc Orb: Any Jewels with CS
Armor: Amethysts, Res Gems, or Crafted Jewels with AS/HR/BS
Shield: Fal Runes or Turquoises
MYSTIC ORBS
Weapon (Starhawk): IED
Weapon (Steel Punisher): DS
Armor (SU): HR → DEX → Max Damage
Armor (TU): DEX → Max Damage → Life Regen → MF → HR
Jewelry: PLR → flat Life → Mana Regen → MF
Orb: FCR
*Use a Max Damage Catalyst for Crafted Jewels.
► END GAME UPGRADES - ELEMENTAL
UPGRADE KIT (ELEMENTAL)
Placeholder gear list.
Henchmen Trophies set, listed Rings, and maybe Shield are not SSF-viable. Will add a cheaper setup if I find one.
GEAR
Armor:
Shield:
Helm:
Belt:
Gloves:
Boots:
Amulet:
Rings:
SOCKET FILLERS*
Weapon: Fal Runes → Fel Runes
Armor: Amethysts, Fal or Fel Runes, or Crafted Jewels (if you need to hit BPs)All Runewords: Crafted Jewels with +2% DEX and +15% AS, HR, or BS (whichever you need)
MYSTIC ORBS
Armor: DEX → Life Regen
Jewelry: PLR
UNIQUE MYSTIC ORBS (optional)
Weapon:
Armor:
Jewelry:
*Use a Flat Attributes Catalyst for Crafted Jewels.
Placeholder gear list.
Henchmen Trophies set, listed Rings, and maybe Shield are not SSF-viable. Will add a cheaper setup if I find one.
GEAR
Armor:
Lachdanan's Visage
(recommended option), or Lachdanan's Visage
Banded Plate (Sacred)
Defense: (8973 - 10165) to (14769 - 16229)
(Sorceress Only)
Required Level: 100
Required Dexterity: 627
Item Level: 120
Mana Shield: 65% less Mana Drained when Hit
You may Only use Melee, Summon and Support Skills
Adds 200-300 Magic Damage
Adds 150-200 Fire Damage
Adds 150-200 Lightning Damage
Adds 150-200 Cold Damage
-30% to Enemy Elemental Resistances
+(161 to 200)% Enhanced Defense
+(1000 to 5000) Defense
Socketed (6)
Hellfire Plate

in Sacred Ceremonial Armor (serviceable option until you find Lachdanan's)Hellfire Plate
Body Armors
'IgnJahGurRhal'
Runeword Level: 115
+1% Innate Elemental Damage per 250 Strength and Dexterity
15% Chance to cast level 9 Life Spark on Melee Attack
20% Attack Speed
+250 Fire Damage
-(11 to 15)% to Enemy Elemental Resistances
+(171 to 200)% Enhanced Defense
Maximum Life +(3 to 5)%
Maximum Elemental Resists +(1 to 2)%
Fire Resist +(10 to 20)%
Lightning Resist +(10 to 20)%
Cold Resist +(10 to 20)%
Poison Resist +(10 to 20)%
Physical Resist (7 to 10)%
Shield:
Svalinn

in a Sacred Spiked ShieldSvalinn
Shields
'RhalLoOhn'
Runeword Level: 115
-1% to Enemy Elemental Resistances per 150 Dexterity
8% Chance to cast level 7 Life Spark when Blocking
1% Base Block Chance
15% Block Speed
20% Hit Recovery
+(151 to 200)% Enhanced Defense
+(30 to 40) to all Attributes
(15 to 20)% to Dexterity
+200 to Life
Fire Resist +(20 to 25)%
Lightning Resist +(20 to 25)%
Cold Resist +(20 to 25)%
Poison Resist +(20 to 25)%
Fire Absorb (3 to 5)%
Physical Resist 5%
Helm:
Blackskull's Horns
Henchmen Trophies
(Legendary Set)
Blackskull's Horns
Crown (Sacred)
Defense: 4437 to 4914
Required Level: 100
Required Strength: 675
Item Level: 120
Adds 100-150 Fire Damage
+25% to Fire Spell Damage
-15% to Enemy Fire Resistance
+200% Enhanced Defense
+50 to Strength
15% to Strength
Maximum Fire Resist +2%
+5 Fire Absorb
Socketed (4)
Crown (Sacred)
Defense: 4437 to 4914
Required Level: 100
Required Strength: 675
Item Level: 120
Adds 100-150 Fire Damage
+25% to Fire Spell Damage
-15% to Enemy Fire Resistance
+200% Enhanced Defense
+50 to Strength
15% to Strength
Maximum Fire Resist +2%
+5 Fire Absorb
Socketed (4)
Henchmen Trophies
(Legendary Set)
Belt:
Doomcloud Spine
Henchmen Trophies
(Legendary Set)
Doomcloud Spine
Plated Belt (Sacred)
Defense: 4089 to 4479
Required Level: 100
Required Strength: 675
Item Level: 120
Adds 100-150 Lightning Damage
+25% to Lightning Spell Damage
-15% to Enemy Lightning Resistance
+200% Enhanced Defense
+50 to Vitality
15% to Vitality
Maximum Lightning Resist +2%
+5 Lightning Absorb
Socketed (2)
Henchmen Trophies
(Legendary Set)
Gloves:
Stareye's Claws
Henchmen Trophies
(Legendary Set)
Stareye's Claws
Gauntlets (Sacred)
Defense: 1674 to 1959
Required Level: 100
Required Strength: 625
Item Level: 120
Adds 100-150 Cold Damage
+25% to Cold Spell Damage
-15% to Enemy Cold Resistance
+200% Enhanced Defense
+50 to Dexterity
15% to Dexterity
Maximum Cold Resist +2%
+5 Cold Absorb
Socketed (4)
Gauntlets (Sacred)
Defense: 1674 to 1959
Required Level: 100
Required Strength: 625
Item Level: 120
Adds 100-150 Cold Damage
+25% to Cold Spell Damage
-15% to Enemy Cold Resistance
+200% Enhanced Defense
+50 to Dexterity
15% to Dexterity
Maximum Cold Resist +2%
+5 Cold Absorb
Socketed (4)
Henchmen Trophies
(Legendary Set)
Boots:
Fangskin Scales
Henchmen Trophies
(Legendary Set)
Fangskin Scales
Greaves (Sacred)
Defense: 2481 to 2799
Required Level: 100
Required Strength: 650
Item Level: 120
(10 to 40)% Movement Speed
Adds 6-8 Poison Damage over 1 seconds
+25% to Poison Spell Damage
-15% to Enemy Poison Resistance
+200% Enhanced Defense
+50 to Energy
15% to Energy
Maximum Poison Resist +2%
Socketed (4)
Henchmen Trophies
(Legendary Set)
Amulet:
Quov Tsin's Talisman
Quov Tsin's Talisman
Amulet
Required Level: 110
Item Level: 110
15% Innate Elemental Damage
-(20 to 30)% to Enemy Elemental Resistances
Amulet
Required Level: 110
Item Level: 110
15% Innate Elemental Damage
-(20 to 30)% to Enemy Elemental Resistances
Rings:
Bad Mood
, Bad Mood
Ring
Required Level: 100
Item Level: 120
-20% Cast Speed
Adds 50-100 Fire Damage
Adds 50-100 Lightning Damage
Adds 50-100 Cold Damage
-(5 to 20)% to Enemy Fire Resistance
-(5 to 20)% to Enemy Lightning Resistance
-(5 to 20)% to Enemy Cold Resistance
Ring
Required Level: 100
Item Level: 120
-20% Cast Speed
Adds 50-100 Fire Damage
Adds 50-100 Lightning Damage
Adds 50-100 Cold Damage
-(5 to 20)% to Enemy Fire Resistance
-(5 to 20)% to Enemy Lightning Resistance
-(5 to 20)% to Enemy Cold Resistance
Empyrean Glory
, or Empyrean Glory
Ring
Required Level: 50
Item Level: 120
1% Chance to cast level 40 Singularity on Kill
(6 to 10)% to All Attributes
Maximum Life +5%
Maximum Mana +15%
15% Gold Find
Ring
Required Level: 50
Item Level: 120
1% Chance to cast level 40 Singularity on Kill
(6 to 10)% to All Attributes
Maximum Life +5%
Maximum Mana +15%
15% Gold Find
Adrenaline Rush
Adrenaline Rush
Ring
Required Level: 100
Item Level: 120
+1 to All Skills
40% Combat Speeds
40% Movement Speed
Maximum Elemental Resists +1%
Ring
Required Level: 100
Item Level: 120
+1 to All Skills
40% Combat Speeds
40% Movement Speed
Maximum Elemental Resists +1%
SOCKET FILLERS*
Weapon: Fal Runes → Fel Runes
Armor: Amethysts, Fal or Fel Runes, or Crafted Jewels (if you need to hit BPs)All Runewords: Crafted Jewels with +2% DEX and +15% AS, HR, or BS (whichever you need)
MYSTIC ORBS
Armor: DEX → Life Regen
Jewelry: PLR
UNIQUE MYSTIC ORBS (optional)
Weapon:
Warbringer
Warbringer
Mystic Orb
Right-Click to Apply
3% Chance to cast level 5 Arrow on Striking
Adds 3-4 Damage
+10 Required Level
Mystic Orb
Right-Click to Apply
3% Chance to cast level 5 Arrow on Striking
Adds 3-4 Damage
+10 Required Level
Armor:
Idol of Stars
Idol of Stars
Mystic Orb
Right-Click to Apply
+14 to Strength
+14 to Dexterity
+10 to Energy
+10 Required Level
Mystic Orb
Right-Click to Apply
+14 to Strength
+14 to Dexterity
+10 to Energy
+10 Required Level
Jewelry:
Farnham's Lost Marble
, Farnham's Lost Marble
Mystic Orb
Right-Click to Apply
1% Movement Speed
+30 Life on Melee Attack
+30 Mana on Melee Attack
+10 Required Level
Mystic Orb
Right-Click to Apply
1% Movement Speed
+30 Life on Melee Attack
+30 Mana on Melee Attack
+10 Required Level
Marksman's Eye
Marksman's Eye
Mystic Orb
Right-Click to Apply
5% Attack Speed
+3 to Minimum Damage
10% Bonus to Attack Rating
2% to Dexterity
+10 Required Level
Mystic Orb
Right-Click to Apply
5% Attack Speed
+3 to Minimum Damage
10% Bonus to Attack Rating
2% to Dexterity
+10 Required Level
*Use a Flat Attributes Catalyst for Crafted Jewels.
► END GAME UPGRADES - PHYSICAL
UPGRADE KIT (PHYSICAL)
TBA. Likely only for TG warriors.
For now, I don’t think Phys is even worth considering for SSF players. Here’s why:
1.) Compared to Elemental with Lachdanan's, it doesn't have the defensive capabilities to survive End Game content without impossible-to-find gear. You’re losing 2 of your biggest defensive options (Block and Mana Shield), and all you gain is a tiny Defense boost. Plus, Phys builds don’t have nearly as many gear options with Max Res as Elemental builds, and defense vs. Elemental damage is Melee Sorc’s biggest defensive weakness.
2.) It’s been implied you’ll need SSSUs and tons of stacked UMOs+Effigies just to make it work. If so, the entire Phys path is pointless for SSF play. I hope this isn’t the case, but at this point, I wouldn’t be surprised if it is.
If I can get a decent SSF-viable gear combo working, I’ll add it. Otherwise, RIP SSF players. You are not the target audience anymore.
Anyway, some options to consider:
GEAR
Weapon:
- Miragein a Sacred Warp Blade (not Crystal Sword)


 Mirage
Sorceress Crystal Swords
'ElqOhnVezLozGurXod'
Runeword Level: 120
+80 Magic Damage per 1% Deadly Strike
10% Chance to cast level 4 Time Strike on Striking
+(2 to 3) to All Skills
50% Combat Speeds
+(220 to 250) to Maximum Damage
+(180 to 200)% Enhanced Damage
+75 to Dexterity
Maximum Block Chance +10%
Not tested. Not SSF-viable (imo). But it's obvious this is what you're supposed to use.
- Strength Beyond StrengthStrength Beyond Strength
Gothic Plate (Sacred)
Defense: (8339 - 9198) to (10115 - 11157)
Required Level: 100
Required Strength: 675
Item Level: 120
Adds 25-40 Damage
150% Bonus to Attack Rating
+50% Damage to Demons
25% Life stolen per Hit
10% Deadly Strike
+(172 to 200)% Enhanced Defense
1% Reanimate as: Random Monster
-5 to Light Radius
Socketed (6)
Tested a few body armors. This is probably one of the better options.
- Lightforge
 Lightforge
Kite Shield (Sacred)
Defense: (4144 - 5055) to (5252 - 6315)
Chance to Block: Class%
Required Level: 100
Required Strength: 550
Required Dexterity: 559
Item Level: 105
Gematria
(Bonus for each Socketed Great/Elemental Rune)
+5% Physical Resist
-5% Elemental Resists
+25% Bonus to Defense
1% Chance to cast level 10 Thunder Hammer on Striking
-10% Movement Speed
+(100 to 150)% Enhanced Defense
+(500 to 1000) Defense
+(1000 to 2000) Defense vs. Missile
+(30 to 50) to all Attributes
+(30 to 50) Life after each Demon Kill
Socketed (4)
Tested. Works fine. Not sure if it’s the best option, but also not sure what other option you have, except... - Shield of Hakan II
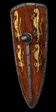 Shield of Hakan II
Gothic Shield (Sacred)
Defense: (6995 - 7994) to (9190 - 10428)
Chance to Block: 1% + Class%
Required Level: 100
Required Strength: 600
Required Dexterity: 619
Item Level: 105
1% Base Block Chance
-25% Cast Speed
-50% to Spell Damage
Slows Attacker by 25%
+(150 to 200)% Enhanced Defense
+(2000 to 3000) Defense
Maximum Life +(3 to 5)%
Maximum Elemental Resists +(0 to 2)%
Physical Resist 5%
Socketed (4)
Tested. Not SSF-viable. You’ll never get one with +2 Max F/C/L/P Res.
- Endless PrideEndless Pride
Cap (Sacred)
Defense: 1187 to 1201
Required Level: 120
Required Strength: 500
Item Level: 130
Restitution
(Based on Restore Percentage)
+2 to All Skills
+50% Bonus to Defense
Maximum Elemental Resists +3%
Cube with Heavenly Soul: Restore +20%
+4 to Life (Based on Character Level)
+2 to Mana (Based on Character Level)
Elemental Resists +10%
(1 to 50)% Magic Find
Socketed (4)
Not tested. Not SSF-viable.
- Black Void
 Black Void
Heavy Belt (Sacred)
Defense: (3060 - 3442) to (3304 - 3717)
Required Level: 100
Required Strength: 625
Item Level: 120
20% Attack Speed
Adds 10-15 Damage
(10 to 15)% Life stolen per Hit
Slow Target 10%
+(140 to 170)% Enhanced Defense
10% to Strength
10% to Dexterity
Target Takes Additional Damage of (25 to 50)
30% Magic Find
Socketed (2)
Tested. Works fine. Not sure if SSF-viable though. - Champion of the Triune
 Champion of the Triune
Plated Belt (Sacred)
Defense: 5209 to 6598
Required Level: 115
Required Strength: 665
Item Level: 120
Ethereal
6% Chance to cast level 1 Force Blast on Melee Attack
5% Chance of Crushing Blow
5% Deadly Strike
+200% Enhanced Defense
+(100 to 1000) Defense
Elemental Resists -15%
Physical Resist 5%
Socketed (2)
Not tested. Never found. Not SSF-viable.
- Wind RunnerWind Runner
Boots
'SilElqSilGul'
Runeword Level: 100
+(0 to 1) to All Skills
50% Attack Speed
10% Movement Speed
Adds 25-68 Damage
250% Bonus to Attack Rating
(12 to 15)% Life stolen per Hit
+(171 to 200)% Enhanced Defense
Tested. Not sure if it’s the best option. - Lifecrusher

 Lifecrusher
Boots
'MhalChamUm'
Runeword Level: 110
30% Hit Recovery
0.125% Chance of Crushing Blow (Based on Character Level)
+(171 to 200)% Enhanced Defense
(5 to 10)% to All Attributes
Maximum Life +(7 to 10)%
Maximum Elemental Resists +1%
Elemental Resists +(15 to 25)%
Tested. It's...whatever. Everyone uses it, so...
- Death WardDeath Ward
Amulet
Required Level: 110
Item Level: 105
+(1 to 3) to All Skills
Maximum Elemental Resists +1%
Poison Resist +30%
Poison Length Reduced by 30%
30% Curse Length Reduction
Tested. It’s...whatever. - Dyers EveDyers Eve
Amulet
Required Level: 100
Item Level: 120
5% Chance to cast level 5 Time Strike on Striking
+2 to All Skills
Adds 15-20 Damage
5% Life stolen per Hit
Elemental Resists +10%
Physical Resist (1 to 10)%
Tested. Works fine. Not SSF-viable. - Beads of the Snake QueenBeads of the Snake Queen
Amulet
Required Level: 100
Item Level: 120
4% Chance to cast level 33 Scorpion Blade on Kill
Adds 5-10 Damage
Stun Attack
+(200 to 500) Defense
(20 to 25)% to Strength
(20 to 25)% to Dexterity
+100 Life after each Kill
Not tested. Never found. At this point, I’m not sure this even exists. - Lamen of the ArchbishopLamen of the Archbishop
Amulet
Required Level: 110
Item Level: 120
Orb Effects Applied to this Item are Doubled
+4 to All Skills
Maybe SSF-viable, but stacking Effigies is not, so...
- Giant's KnuckleGiant's Knuckle
Ring
Required Level: 100
Item Level: 120
20% Attack Speed
Adds 10-15 Damage
(5 to 10)% Life stolen per Hit
5% Deadly Strike
+25 Life Regenerated per Second
Physical Resist 5%
Tested. Not sure if SSF-viable, though. - Empyrean GloryEmpyrean Glory
Ring
Required Level: 50
Item Level: 120
1% Chance to cast level 40 Singularity on Kill
(6 to 10)% to All Attributes
Maximum Life +5%
Maximum Mana +15%
15% Gold Find
Not tested. Never found. Not SSF-viable. - Adrenaline RushAdrenaline Rush
Ring
Required Level: 100
Item Level: 120
+1 to All Skills
40% Combat Speeds
40% Movement Speed
Maximum Elemental Resists +1%
Not tested. Never found. Not SSF-viable.
ATTRIBUTE POINTS
Everything into DEX.
SKILL POINTS
Max Endurance → Spec into an End Game path once you’ve completed your Base Kit.
GEARING
Use Oils of Greater Luck on high-end weapons and armor. Lottery you amulets and rings. Don’t Corrupt any items you’re not willing to lose.
► WALKTHROUGH
LATE GAME
CLVL 125
Eve of Destruction – unlocks Specialization
Belial
Yshari Sanctum
Astrogha
Vizjun – Activate the Vizjun Waypoint
Legion of the Damned
Xazax
Fauztinville
Ghosts of Old Bremmtown
Nymyr’s Light
Spirit World
THE CLVL 125-130 GRIND
Grinding spots:
Minimum requirements to move on:
END GAME
CLVL 130
The Void
Invasion III
Nephalem’s Sacrifice
Archbishop Lazarus
THE CLVL 130-135 GRIND
Basically, same as the previous level grind.
While grinding, try to also get the following:
CLVL 135+
Scosglen – Activate the Scosglen Waypoint
I’m considering Scosglen as endgame for this guide. For now, I think Scos (and Lab 5) is probably as far as you’re going SSF. If I’m wrong, I’ll make corrections. Otherwise, good luck and Godspeed you last few SSF kings.
CLVL 125
Eve of Destruction – unlocks Specialization
Belial
Yshari Sanctum
Astrogha
Vizjun – Activate the Vizjun Waypoint
Legion of the Damned
Xazax
Fauztinville
Ghosts of Old Bremmtown
Nymyr’s Light
Spirit World
THE CLVL 125-130 GRIND
Grinding spots:
- Fauzt = XP, Great Runes, SUs/SSUs/SSSUs
- Dunc = less XP, SUs/SSUs, better Demonsbane, Trophy fragments
- Teganze = Essences, Runestones, SUs/SSUs
- Triune = Cycles, SUs/SSUs (grab a couple extra Wormholes—1 for large DEX Cycles and 1 for large MF Cycles.)
- TA = ACs, better Sunstones, Trophy fragments
Minimum requirements to move on:
- Clvl 130
- 300 SoL into DEX
END GAME
CLVL 130
The Void
Invasion III
Nephalem’s Sacrifice
Archbishop Lazarus
THE CLVL 130-135 GRIND
Basically, same as the previous level grind.
While grinding, try to also get the following:
- Completed Umbaru Treasurewith satisfactory rolls.
 Umbaru Treasure
Required Level: 120
Keep in Inventory to Gain Bonus
Cube with Essence/Runestone to Roll Stat
+10% to Spell Damage
Essence Slots: 20 - Completed Corrupted Wormhole(the one you’ve been filling with small and medium Cycles) + a second Wormhole (for large DEX Cycles)
 Corrupted Wormhole
Required Level: 100
Keep in Inventory to Gain Bonus - Perfect, or near perfect, Soul of KabraxisSoul of Kabraxis
Required Level: 120
Keep in Inventory to Gain Bonus
+1 to All Skills
Maximum Fire Resist +(2 to 3)%
Maximum Lightning Resist +(2 to 3)%
Maximum Cold Resist +(2 to 3)%
Maximum Poison Resist +(2 to 3)% - Perfect, or near perfect, versions of Charms that give Attributes, +Skills, and +Sorc Skills
- Dunc+TA Trophies (J-Day Trophy is also helpful)
- 400 SoL into DEX
CLVL 135+
Scosglen – Activate the Scosglen Waypoint
I’m considering Scosglen as endgame for this guide. For now, I think Scos (and Lab 5) is probably as far as you’re going SSF. If I’m wrong, I’ll make corrections. Otherwise, good luck and Godspeed you last few SSF kings.

LEVEL CHALLENGE - CLVL 45 TO 60
► More Info

Location: Act 5 Normal → Worldstone Keep Antechamber (kill Lister the Tormentor to open the rift) → Tran Athulua
BEFORE YOU BEGIN
- Your merc will be helpful.
NOTABLE ENEMIES
- Amazon Warrior
Rangers that deal Phys damage, attack in groups, and flee when you get close. If you carelessly follow, they’ll lead you into an ambush.
MAP
Enemy damage will wreak havoc on your Mana pool, and your low HR will make it tough to take on huge mobs. As long as you AG, you’ll be fine.
BOSS
- Philios
Uses Fire arrows and a small AoE Fire spell. - Lycander
Uses Lightning arrows and Magnetic Field. - Skovos
Uses Ice arrows and a small AoE Cold spell.
STRAT
The goal here is to find and kill the 3 Amazon Priestesses. They hit harder than standard Amazons, and their spells will deal decent damage. Their flee mechanic makes them annoying, so just get close enough to deploy Fusillade, then run around killing Amazons with Bladestorm.
CHARM NOTES
Upon death, each Priestess will drop a unique Elemental Shard. Cube all 3 Shards when you’re at or below clvl 59 to create the
Sunstone of the Twin Seas
If you’re at clvl 60 or higher, you’ll need 2x ACs per 10 clvls to create the Sunstone.Sunstone of the Twin Seas
Required Level: 50
Keep in Inventory to Gain Bonus
+2 to All Skills
10% Combat Speeds
-5% to Enemy Fire Resistance
-5% to Enemy Lightning Resistance
-5% to Enemy Cold Resistance
10% to All Attributes
Elemental Resists +10%
+5% to Experience Gained
Required Level: 50
Keep in Inventory to Gain Bonus
+2 to All Skills
10% Combat Speeds
-5% to Enemy Fire Resistance
-5% to Enemy Lightning Resistance
-5% to Enemy Cold Resistance
10% to All Attributes
Elemental Resists +10%
+5% to Experience Gained
ENNEAD CHALLENGE - CLVL 80+
► More Info

Location: Act 3 Nightmare → Durance of Hate (kill Mephisto to open the rift) → Kurast 3000 B.A.
BEFORE YOU BEGIN
- Have at least +60% Elemental Res.
NOTABLE ENEMIES
- Skeleton Archers
Shoot Elementally-enhanced arrows that can deal decent damage in large groups. - Skeleton Mages
Cast various Elemental spells that will quickly drain your Mana if Mana Shield is active. - Hawks
Tanky melee fighters that swarm. - Shadowgate Totems
Stationary totems whose swirling hammers can deal moderate damage. They also emit a long-range aura that boosts enemies’ Life by +100%.
MAP
Generally, you won’t have much trouble here if you AG, but when going after Totems, a Totem’s hammers+Skeleton damage can quickly drain your Life (especially when Chilled). When you have an opening, rush in and hit a Totem with Fusillade. If you’re not taking too much damage, finish it off asap with Bladestorm spam.
BOSS
There are 3 Ennead Necromancers in the north part of the map. They cast Miasma and will summon more Skeletons, but they’re otherwise harmless.
STRAT
The goal is to find and kill at least 1 Ennead Necromancer. Doing so will drop a Heroic Torch. Cube it to create your Class Charm (for Sorcs, it's a Nexus Crystal).
CHARM NOTES
The Charm requires clvl 90 to activate, so don’t panic if you don’t see any immediate benefits.